
The Beaded Crochet Hat Pattern Guide.
Hello there! I’ve been inspired by my bead craft stash & I have also wanted to create a Summer Crochet Hat. I made 2 different patterns for them, the 2nd version is at the bottom as well. The inspiration was that I really wanted to mix the two [yarn & beading] together to create this mesh inspired open, beaded strand Free crochet hat pattern to share!


MATERIALS
[Used HALF of 1* Skein/Ball for ALL SIZES
Yarn: Caron Simply Soft in “Light Country Blue” / 170 g / 6 oz, 288 meters / 315 yards
US H/8 5.00mm Crochet Hook
Yarn Needle / [depending on bead sizing, a thin needle needed as well]
Scissors
Measuring Tape
Beads
Stitch Markers
Gauge:
12 SC STS [Going Across ] [Width] X 5 DC STS[Going Down Rounds] = 4 in.
10 inches length
Details:
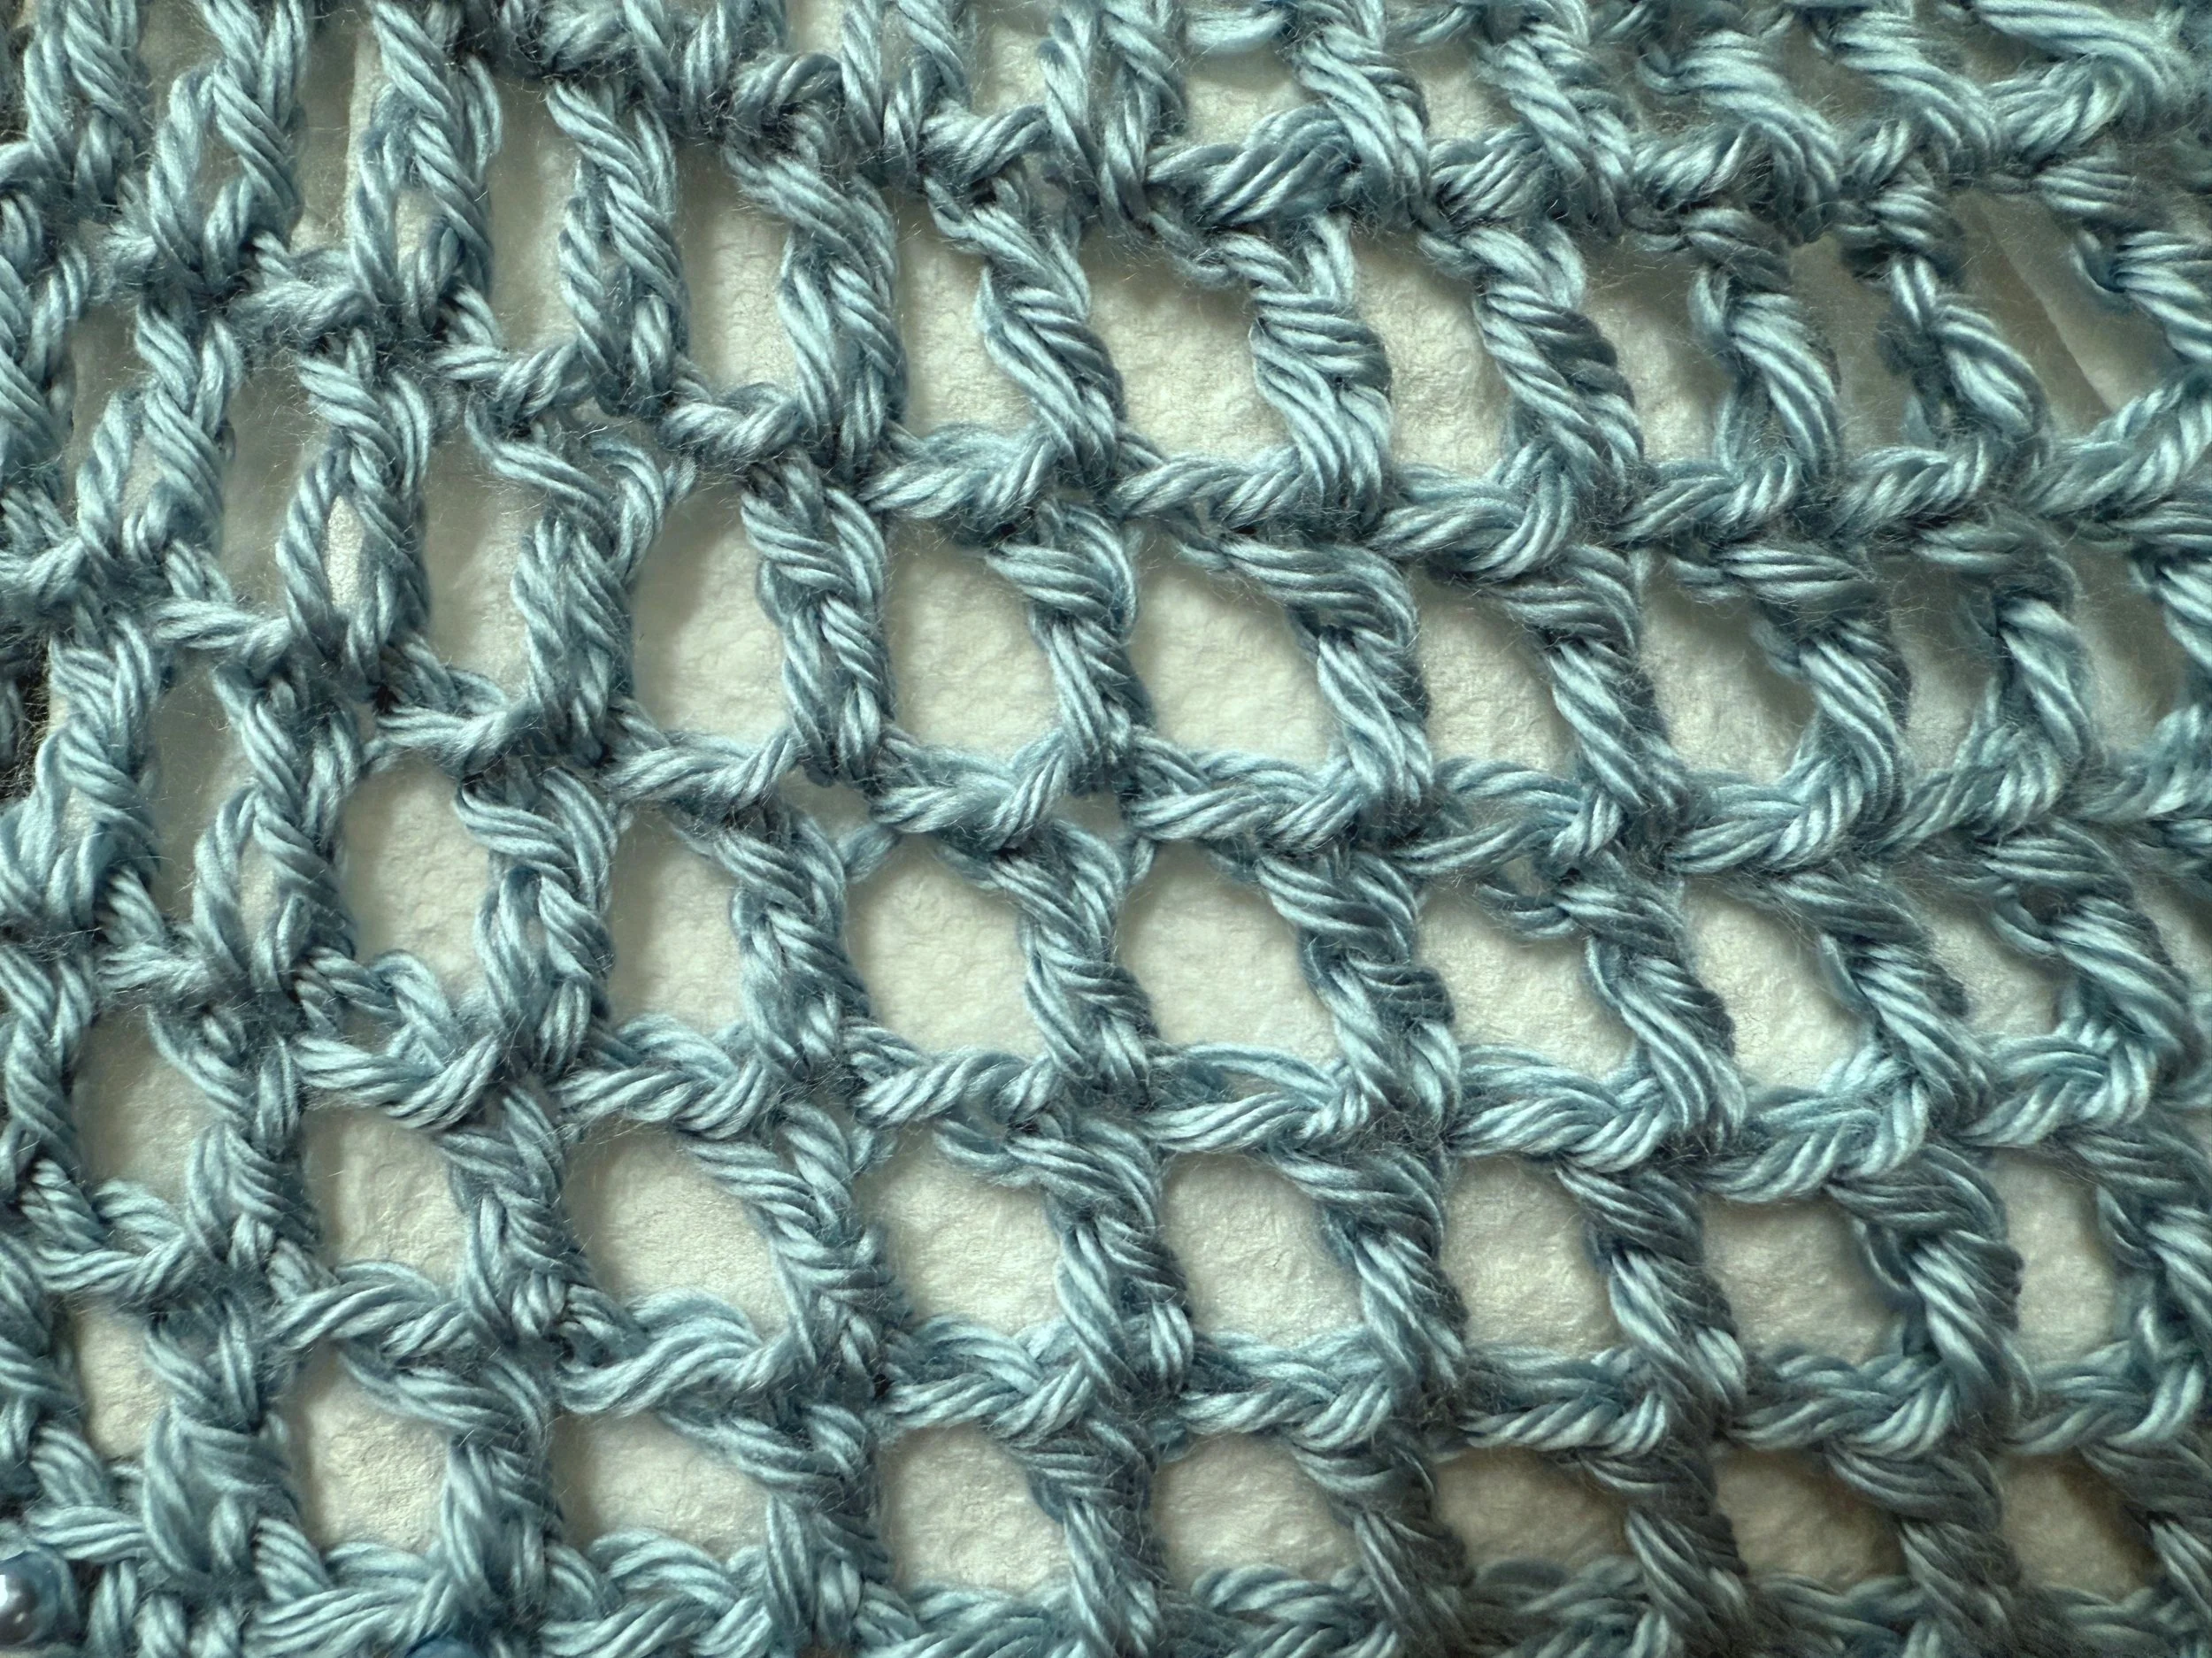
Mesh Inspired Crochet Hat with chain beads adorning the border
Abbreviations:
CH [#] Turning Chain initiated
STS= Stitch [es]
SC= Single Crochet
SC2TOG= Single Crochet 2 STS together [for decrease]
DC= Double Crochet
SL ST= Slip Stitch
RPT =Repeat from asterisk, *follow repeating method from this starting point

STARTING THE PATTERN
Note: Pattern is constructed in rounds, Starting with the full width of the hat- then decrease for the last few rounds to close the hat. May stop at desired round for personal desired fit.
CHAIN for [multiples of 2] EXP: 60 STS,
Then, Connect the last ST, to the very first ST.
RND1: CH1, 1SC around into all of the 60 STS-then at the end of the round, SL ST into the starting chain to continue work.
RND2: CH4 [counts as 1DC and a CH1] Skip 1 ST and **work 1DC into the following ST--Then CH1, Skip 1 ST and...]…[*Repeat from *until the end of the round, SL ST into the starting chain to continue work.]
RND3-RND6: CH4 [counts as 1DC and a CH1] and **work 1DC into the previous round 1DC ST--Then CH1 and...]…[*Repeat from *until the end of each round, SL ST into the starting chain to continue work.]
STARTING THE DECREASE
RND7: CH3 [counts as 1DC] and **work 1DC into the previous round CH1 SPACE ONLY [not the DC ST]...]…[*Repeat from *until the end of the round, SL ST into the starting chain to continue work.]
RND8-RND9: CH3, 1DC around into all of the STS-then at the end of both rounds, SL ST into the starting chain to continue work.
RND10-RND11: CH1, THEN, work 1SC into the next ST, then 1SC2TOG around into all of the STS...]…[*Repeat from *until the end of both rounds, at the end of both rounds, SL ST into the starting chain to continue work.] At the final round, SL ST into the starting chain to complete work. Fasten off, and weave the hat in to close.

starting the decrease.

CREATING THE BEAD STRANDS
NOTE: May rejoin hook in any location to start chain detail & can increase or decrease length or amount of chains going around the hat.
Rejoin hook into Row 1 and chain for 40 STS, leave a semi long strand before cutting off. [This is where you’ll add your beads]
ADDING THE BEADS
Using your needle, thread the long strand from the Chain created, to begin to add on as many beads as desired. Once complete secure the beads in place, with a knot or may use adhesive to stabilize the beads.


MATERIALS
[Used: 1 Skein/Ball for ALL SIZES
Yarn: K&C Botanical [137 yds worsted Bamboo Blend]
US H/8 5.00mm Crochet Hook
Yarn Needle / [depending on bead sizing, a thin needle needed as well]
Scissors
Measuring Tape
Beads
Stitch Markers
Gauge:
12 SC STS [Going Across ] [Width] X 5 DC STS[Going Down Rounds] = 4 in.
10 inches length
Details:
Mesh Inspired Crochet Hat with chain beads adorning the border
Abbreviations:
CH [#] Turning Chain initiated
STS= Stitch [es]
SC= Single Crochet
SC2TOG= Single Crochet 2 STS together [for decrease]
DC= Double Crochet
SL ST= Slip Stitch
RPT =Repeat from asterisk, *follow repeating method fr
STARTING THE PATTERN
Note: This Pattern is constructed in rounds, Starting at the circle of the hat- then increasing.
Create magic circle, then work 10 HDC STS into the middle of the circle.
RND1: CH for 3 STS, (counts as 1HDC and a CH1) then into the next same ST-**Work 2HDC STS, then CH1, Skip 1 ST …[*Repeat from *until the end of the round, at the end of the round, SL ST into the starting chain to continue work.]
RND2: CH for 4 STS, (counts as 1DC and a CH1) **then into the next same CH1 space—Work (1DC, CH1, 1DC, CH1, 1DC) then CH1 …[*Repeat from *until the end of the round, at the end of the round, SL ST into the starting chain to continue work.]
RND3: CH for 4 STS, (counts as 1DC and a CH1) **then into the every middle CH1 space—Work 1DC ST, then CH1 …[*Repeat from *until the end of the round, at the end of the round, SL ST into the starting chain to continue work.]
RND4: CH for 4 STS, (counts as 1DC and a CH1) **then into the following 3 middle CH1 spaces—Work 1DC ST, then CH1-Then into the 4th space now work, (1DC, CH1, 1DC all into the same CH1 space) …[*Repeat from *until the end of the round, SL ST into the starting chain to continue work.]
RND5-RND6: CH for 4 STS, (counts as 1DC and a CH1) **then into the following 4 middle CH1 spaces—Work 1DC ST, then CH1-Then into the 5th CH1 space now work, (1DC, CH1, 1DC all into the same CH1 space) …[*Repeat from *until the end of both rounds, SL ST into the starting chain to continue work.]
RND7-RND9: CH for 4 STS, (counts as 1DC and a CH1) **then into the every middle CH1 space—Work 1DC ST, then CH1 …[*Repeat from *until the end of each round, SL ST into the starting chain to continue work.]
RND10-RND13: CH for 3 STS, (counts as 1HDC and a CH1) **then into the every middle CH1 space—Work 1HDC ST, then CH1 …[*Repeat from *until the end of each round, SL ST into the starting chain to continue work.]
RND14: 1SC into all of the STS, the end of the round, SL ST into the starting chain to complete final work.]
Then follow same beading instruction as previous pattern!
Add reaction