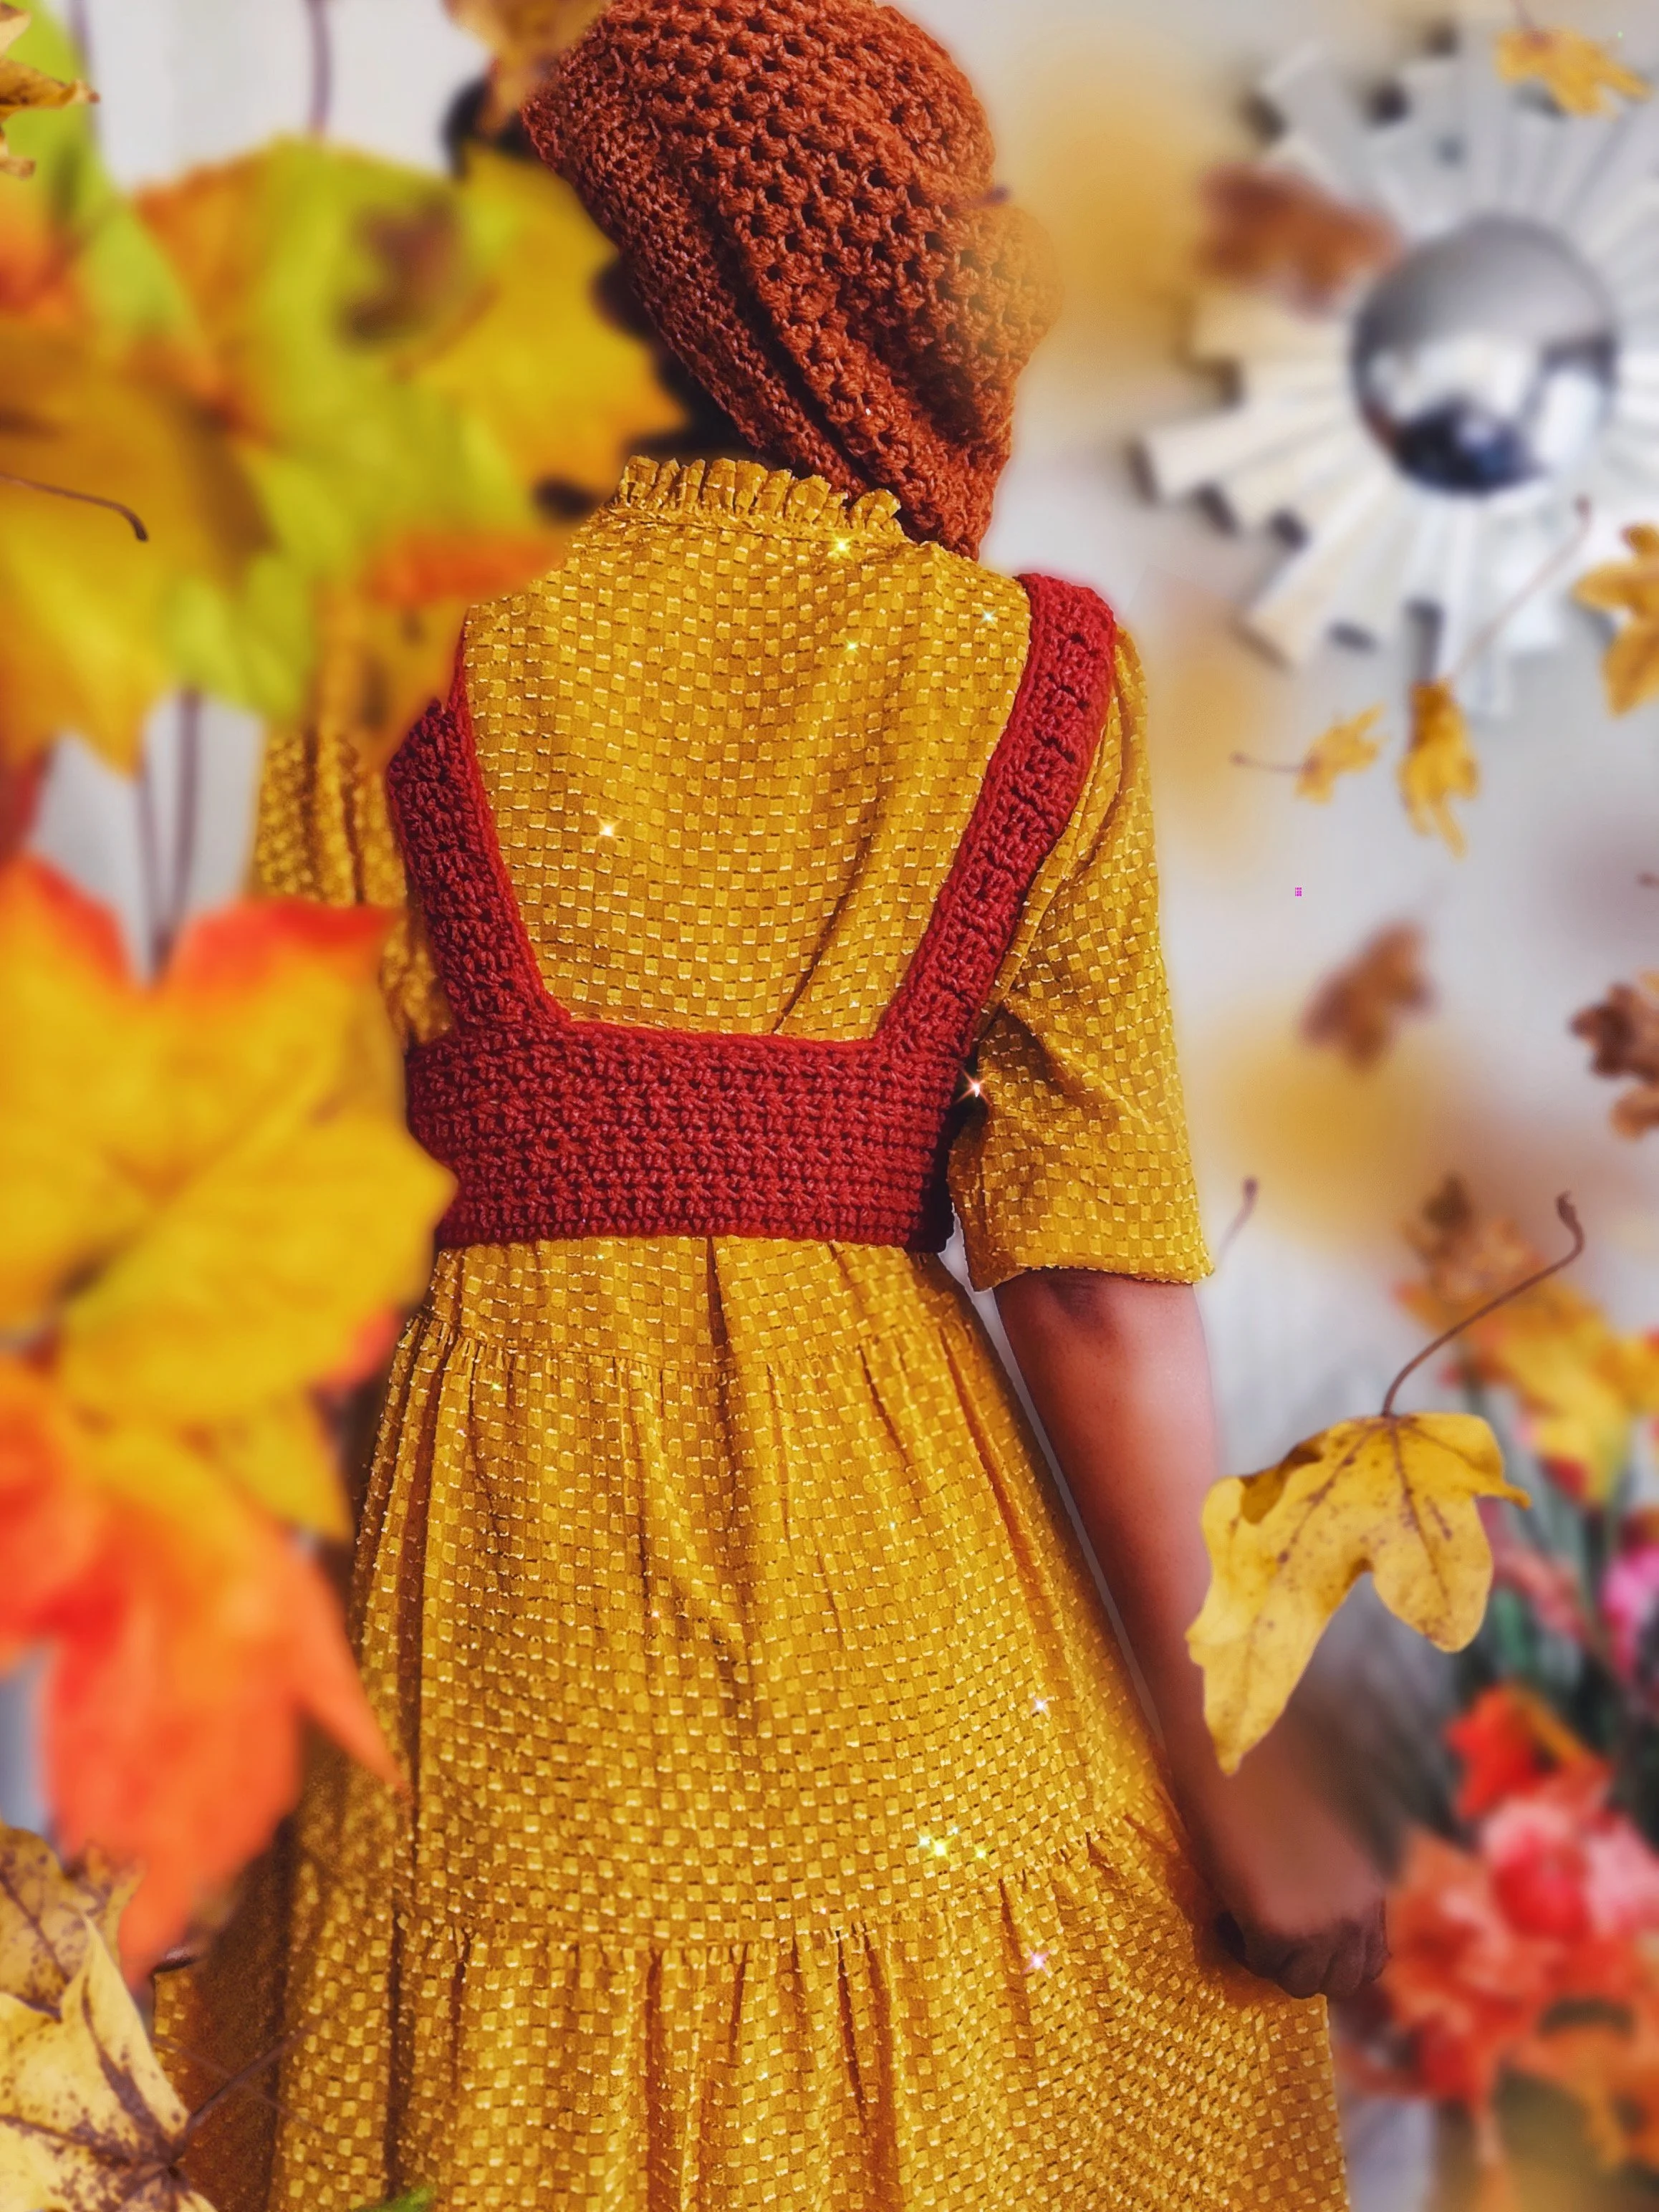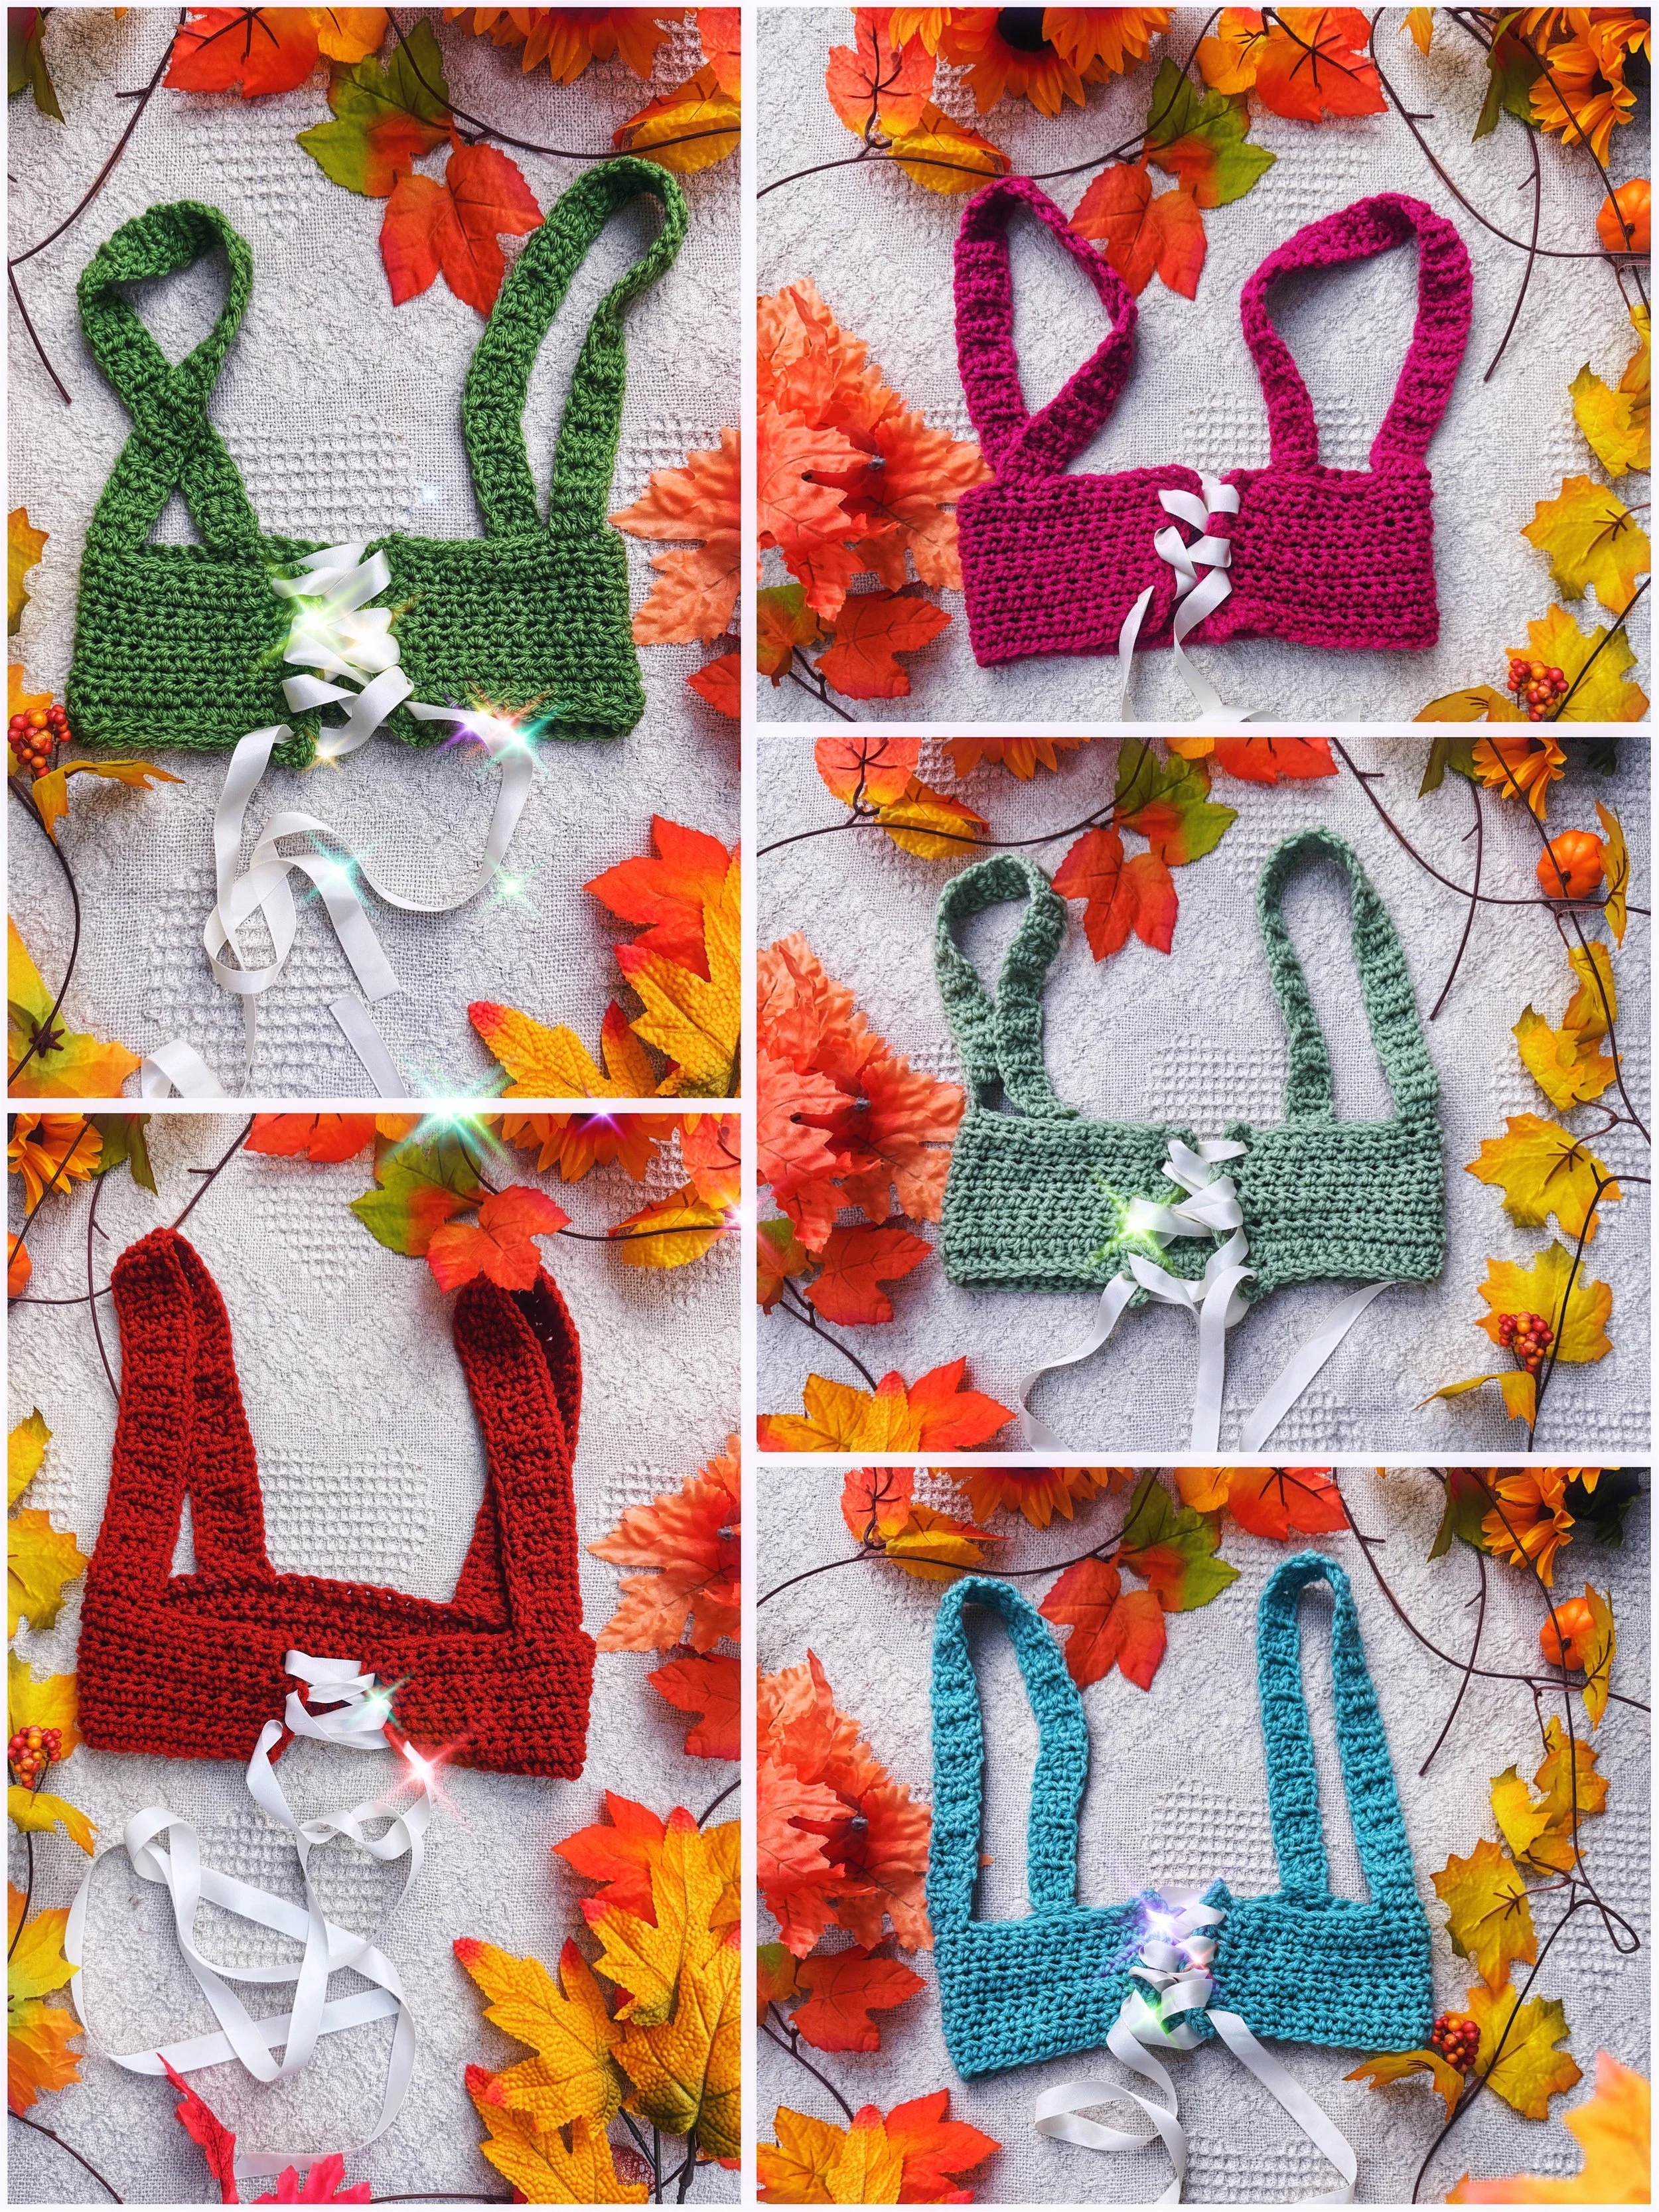
The Dream Crochet Corset Pattern Guide.
Hello there! Today I’ll be sharing another idea to use up that scrap yarn to create something whimsical & wearable! Making crochet corsets, with ribbon detailing are such a fun way to add a bit of character to your everyday outfit. Plus, they’re quick to make & customize as well! Truly hope you enjoy this Fun and Free crochet pattern!

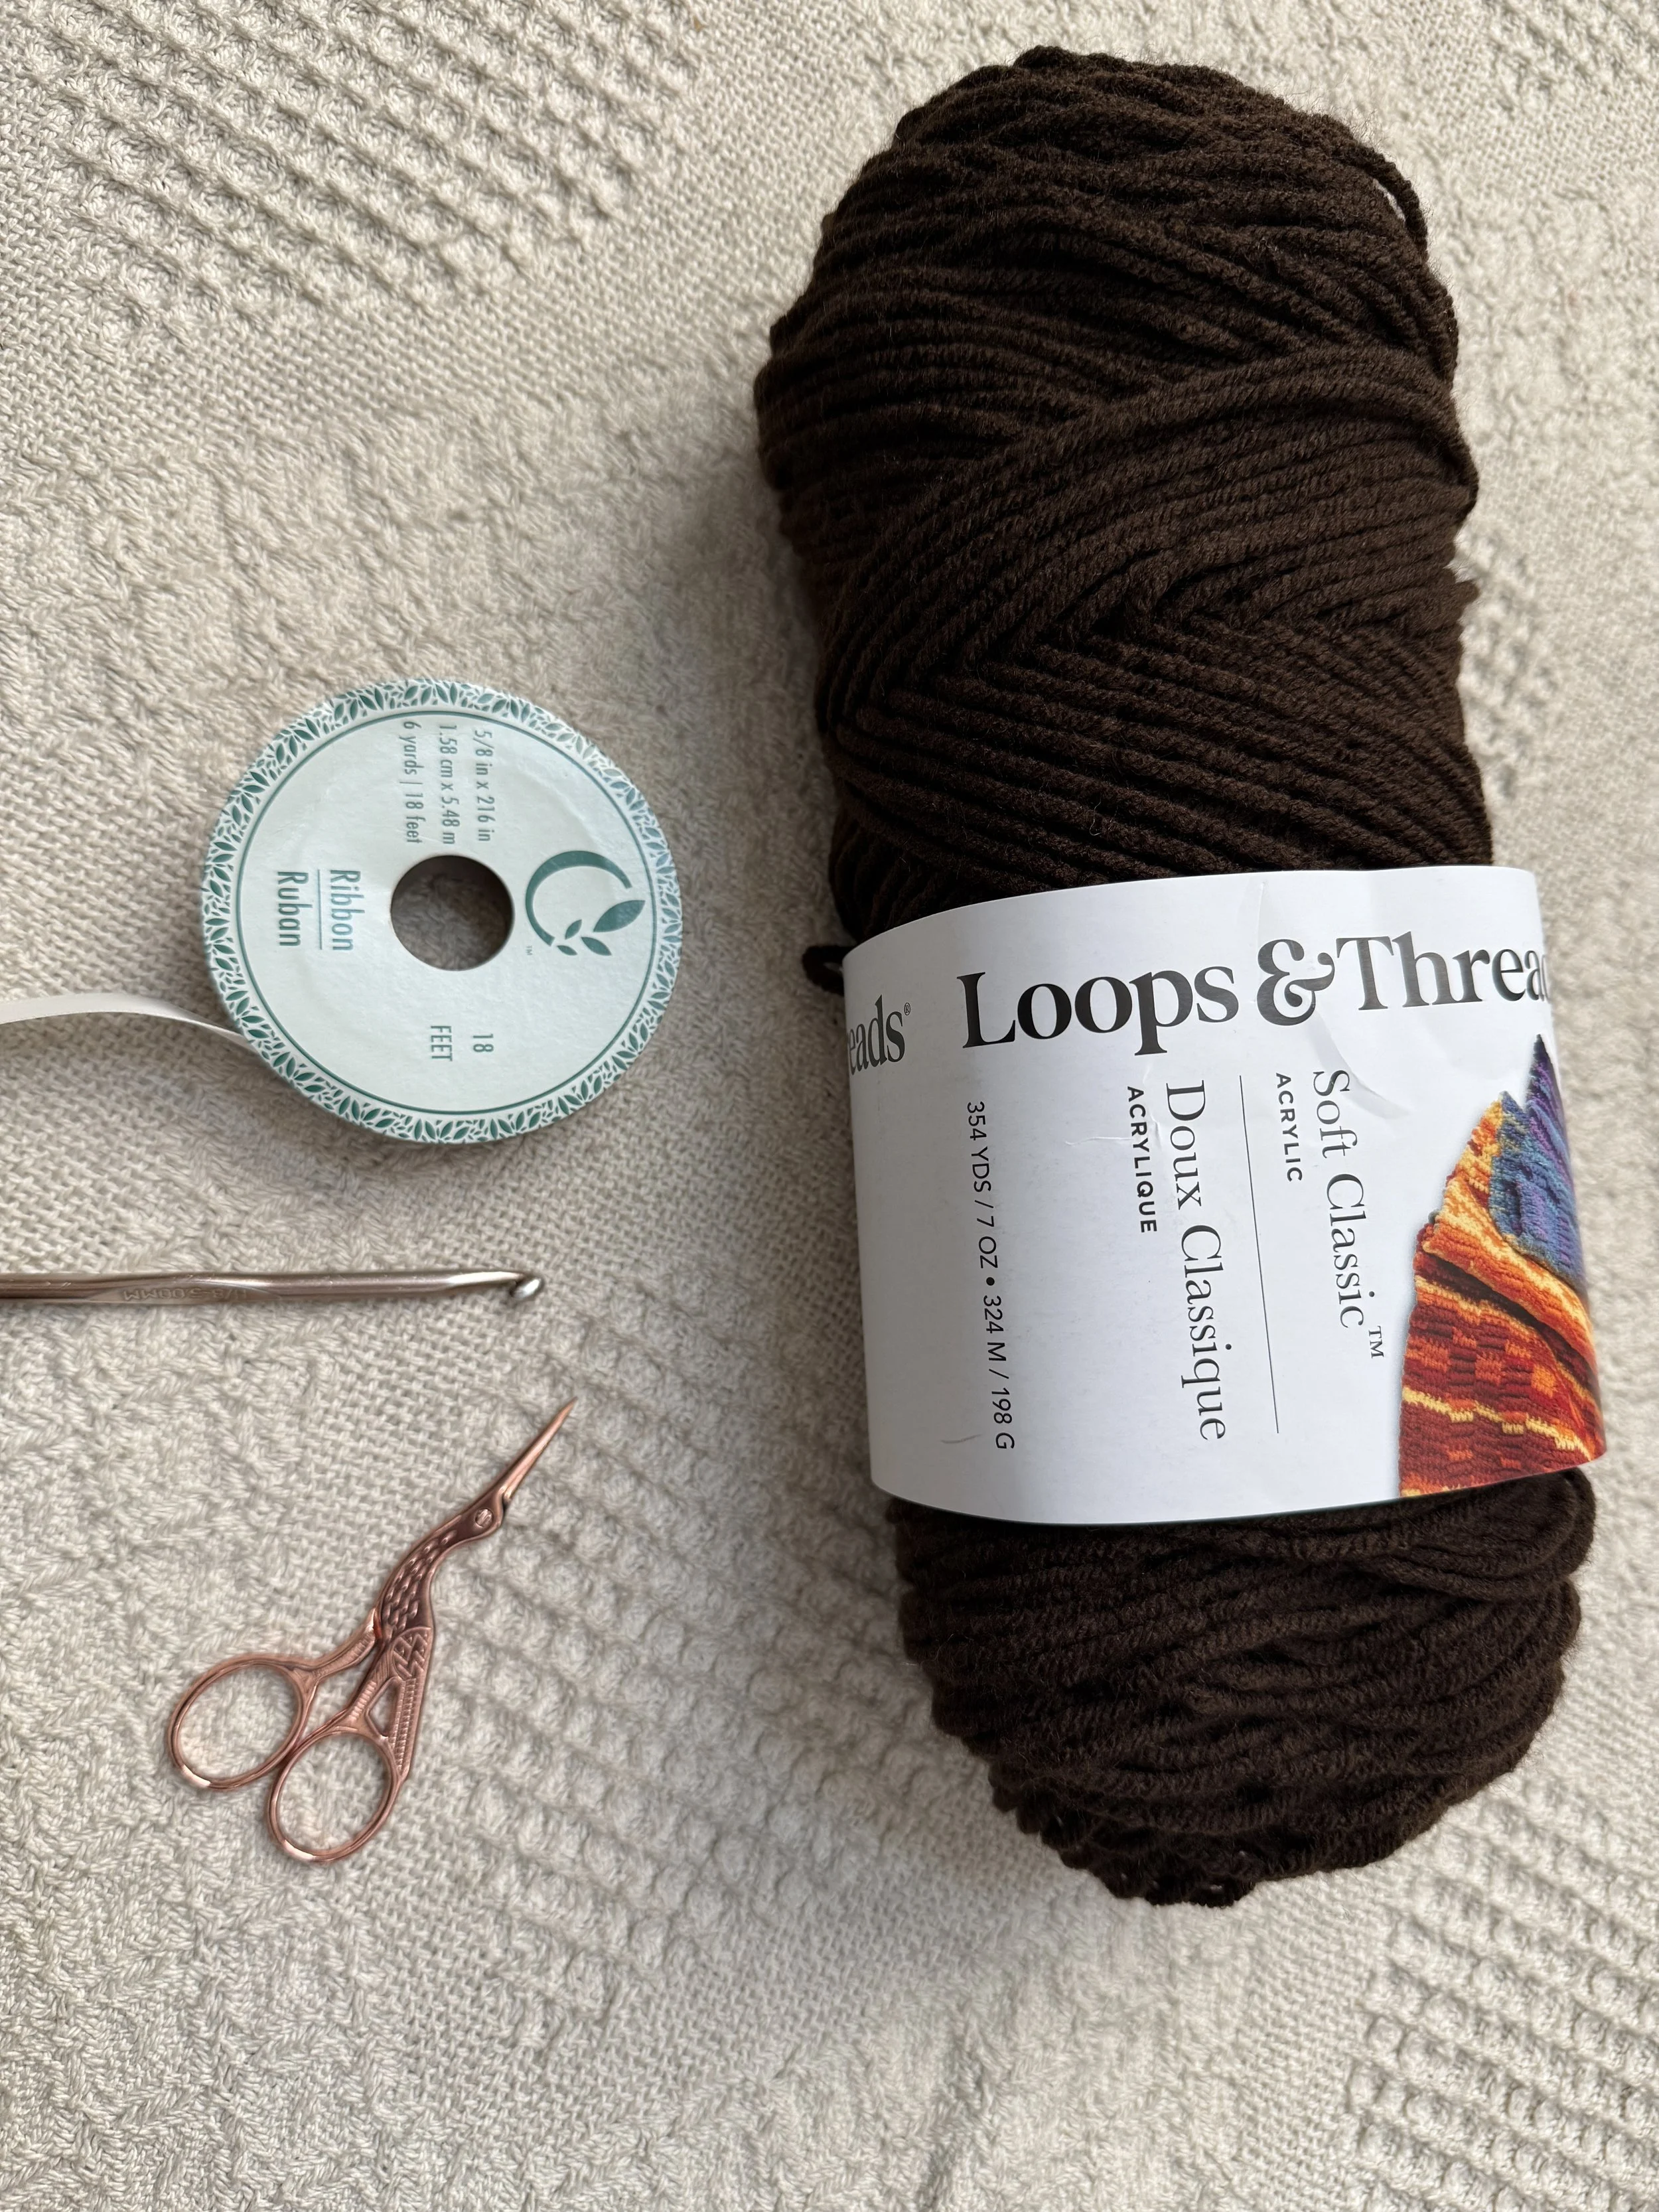
MATERIALS
[Used Less than HALF of 1* Skein/Ball for ALL SIZES
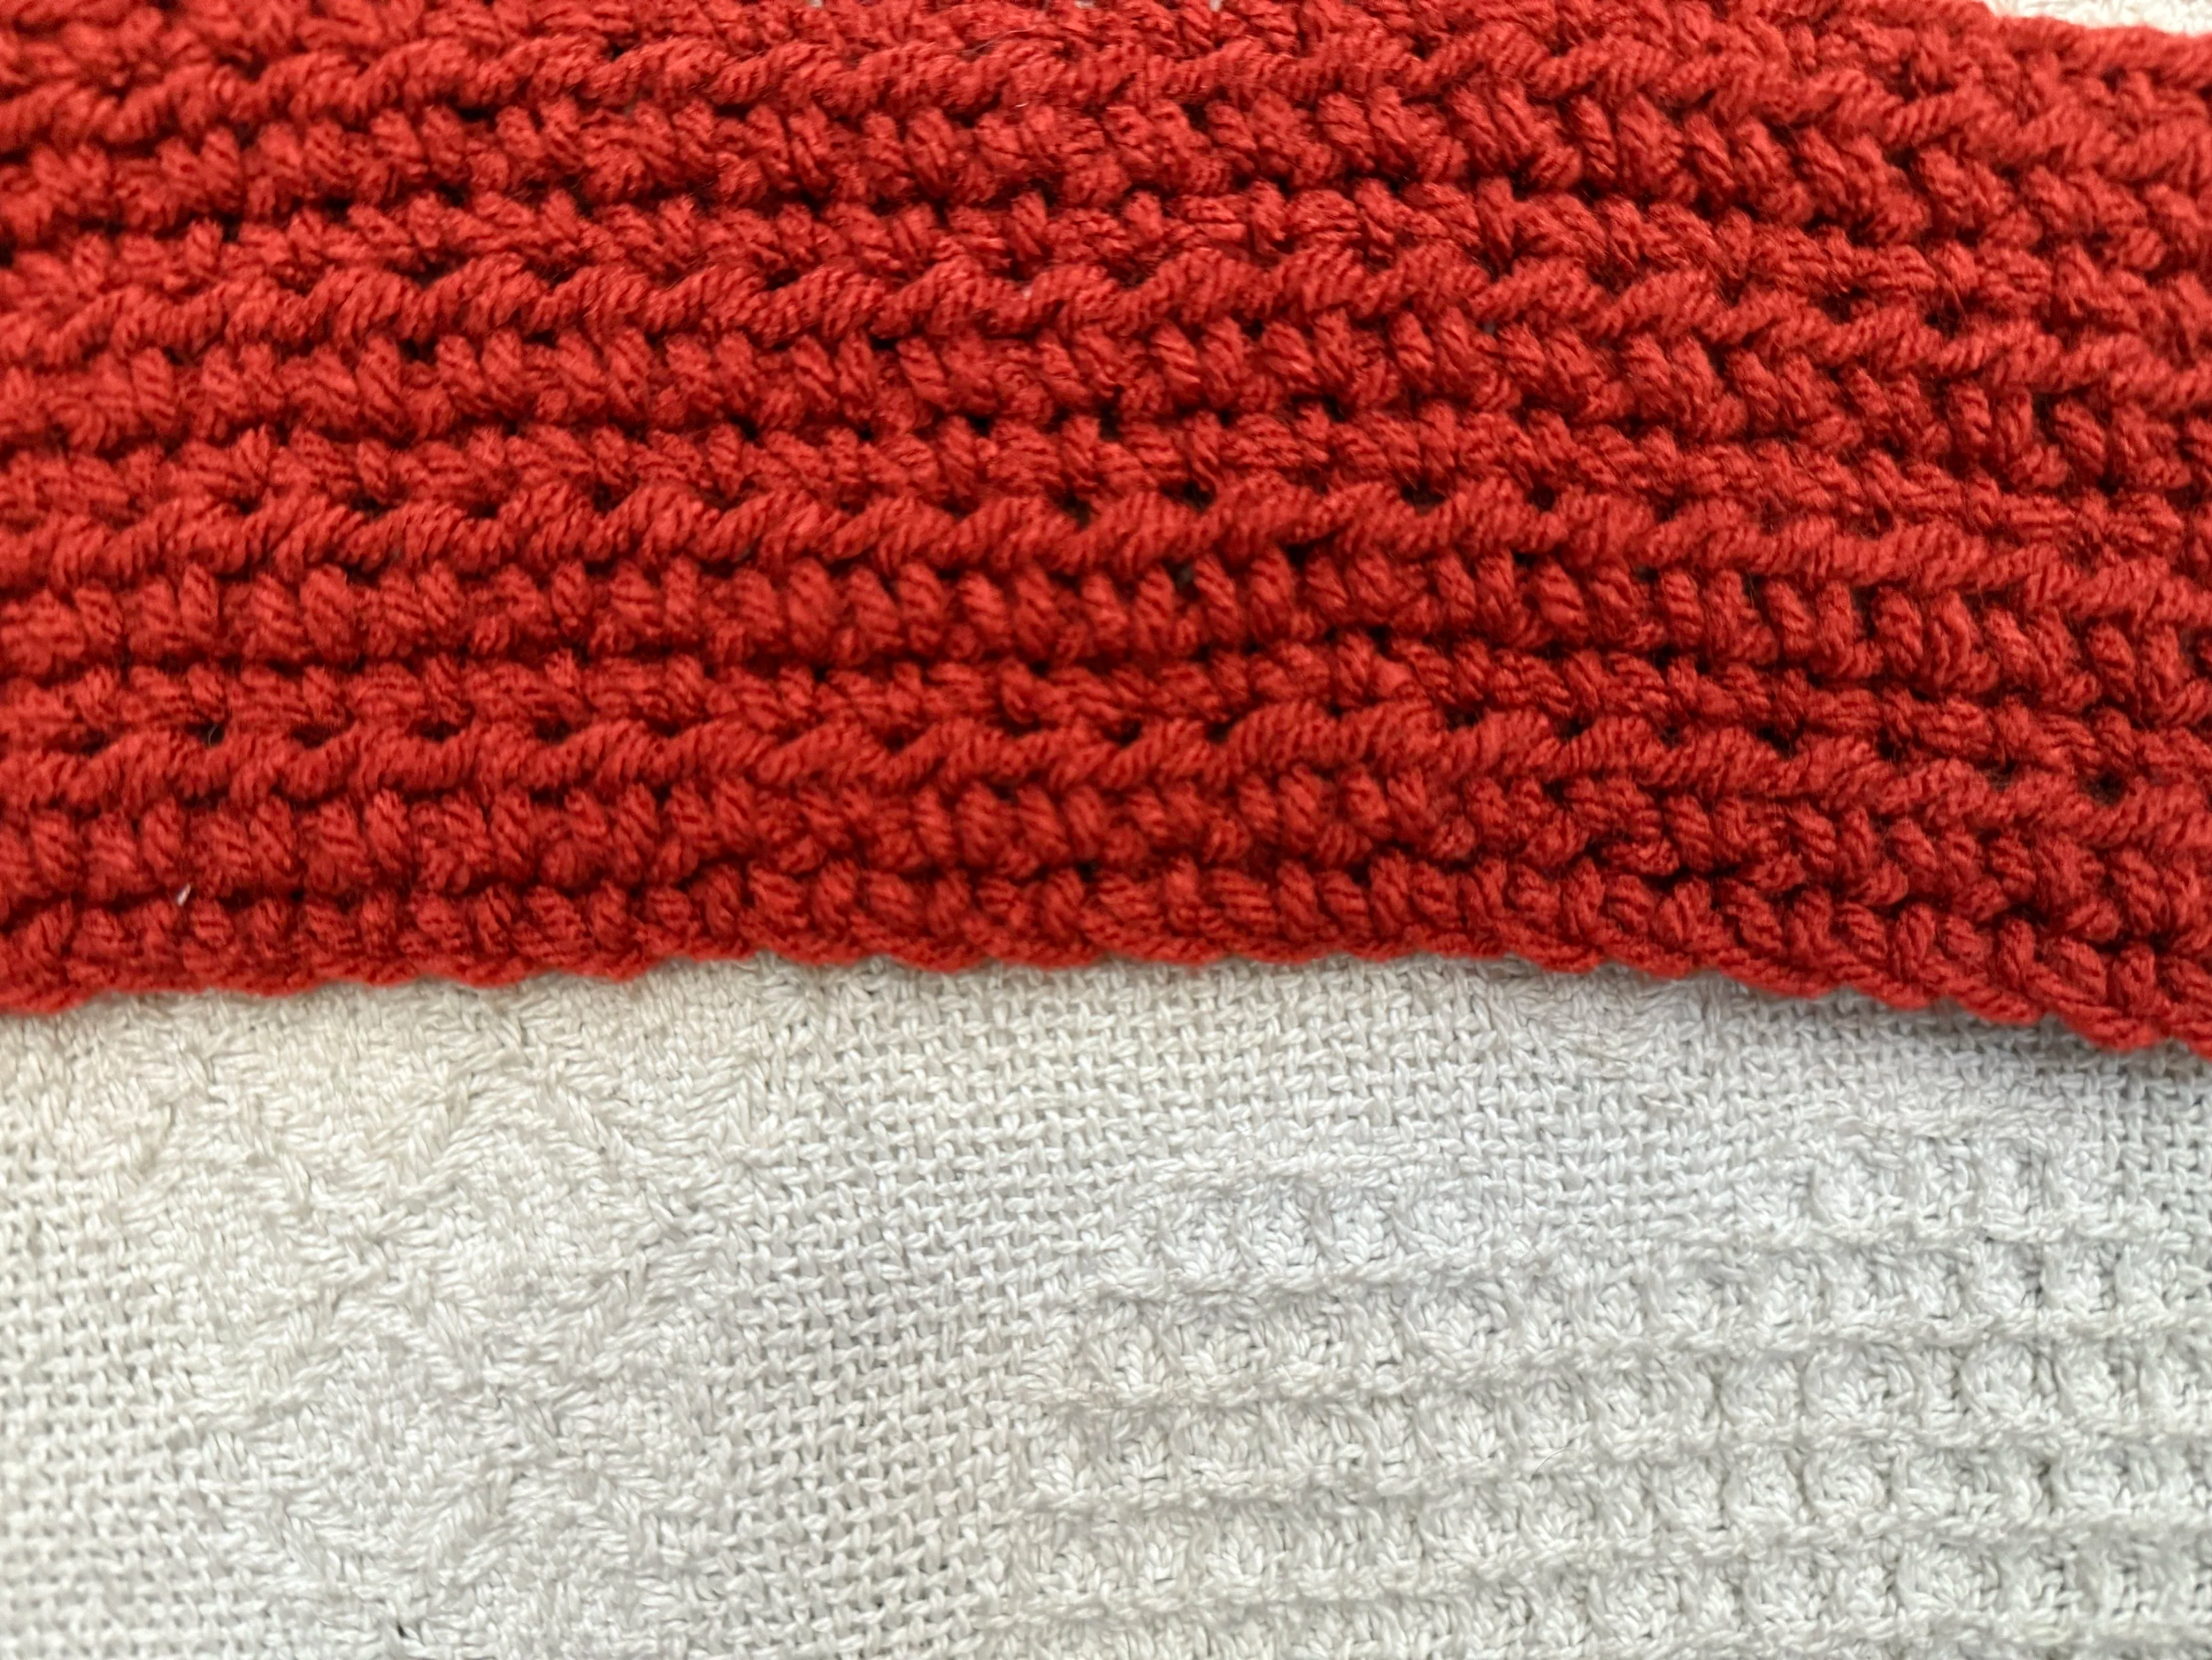
Yarn: Loops and Threads-”Soft & Classic”, / Medium 4 [any kind truly]
US H/8 5.00mm Crochet Hook
Yarn Needle
Scissors
Measuring Tape
Stitch Markers
Satin Ribbon
Gauge:
9HDC STS [Going Across ] [Width] X 10 HDC/SC STS[Going Down Rounds] = 4 in.
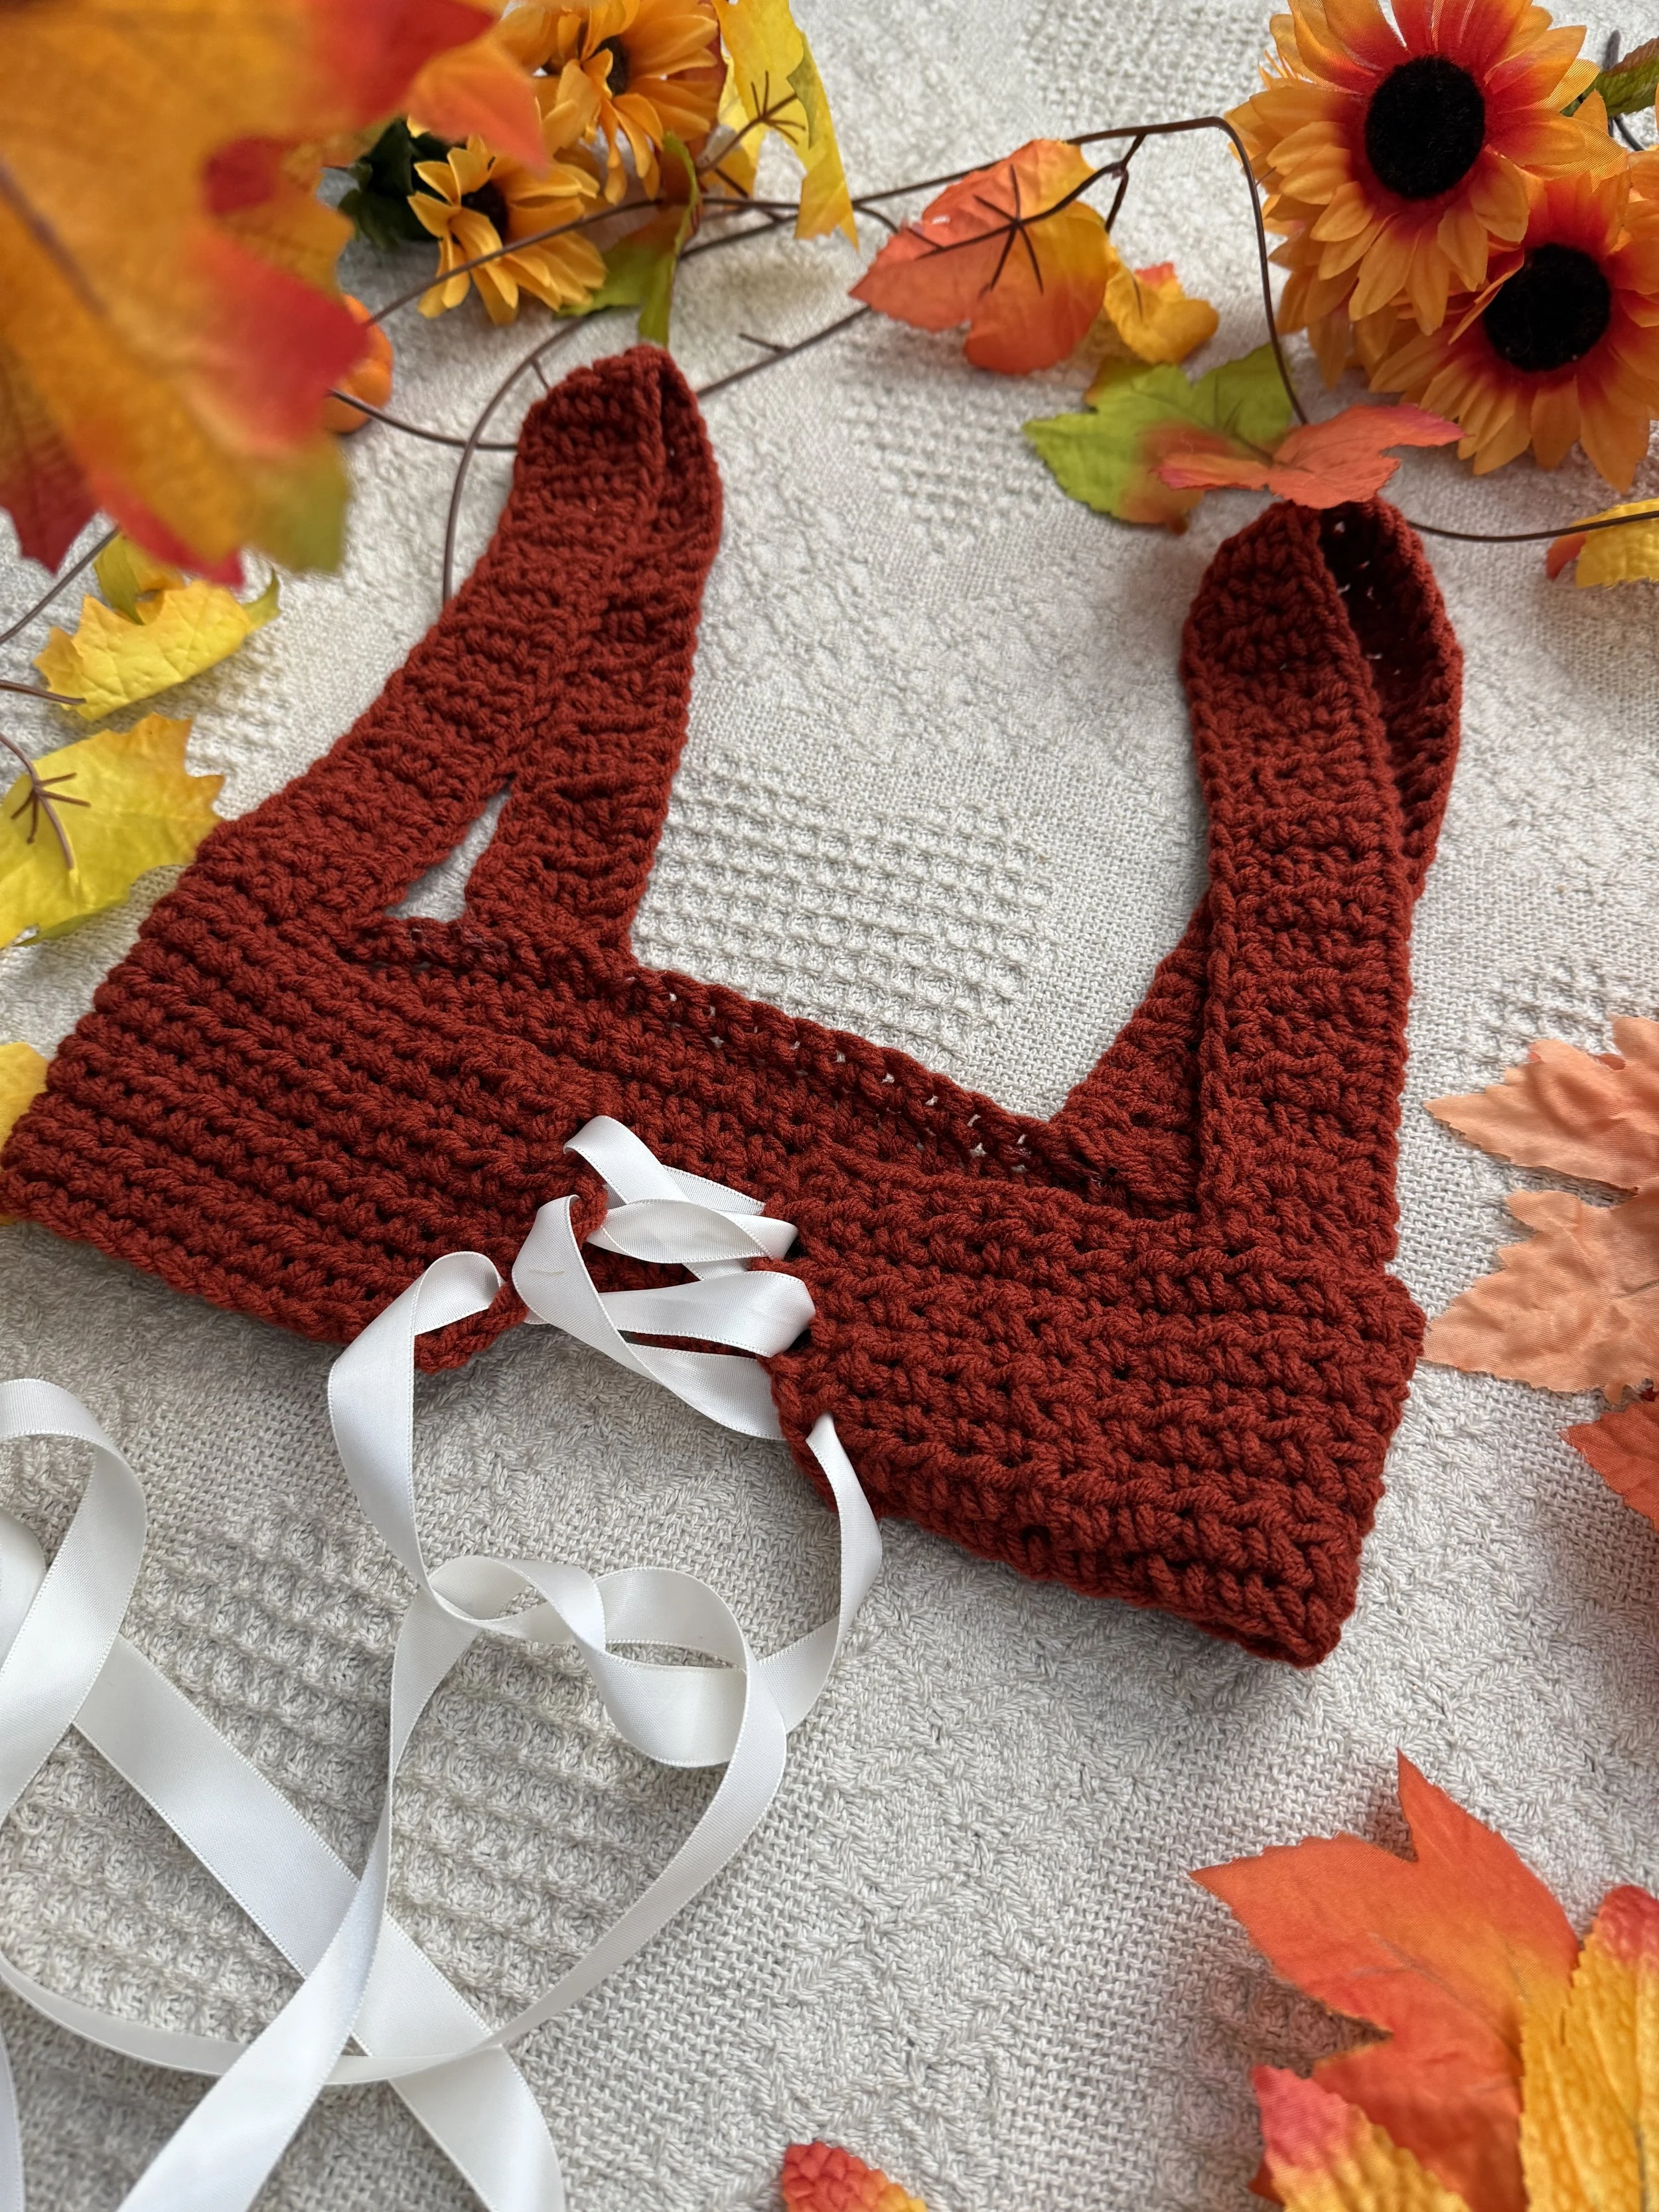
Details:
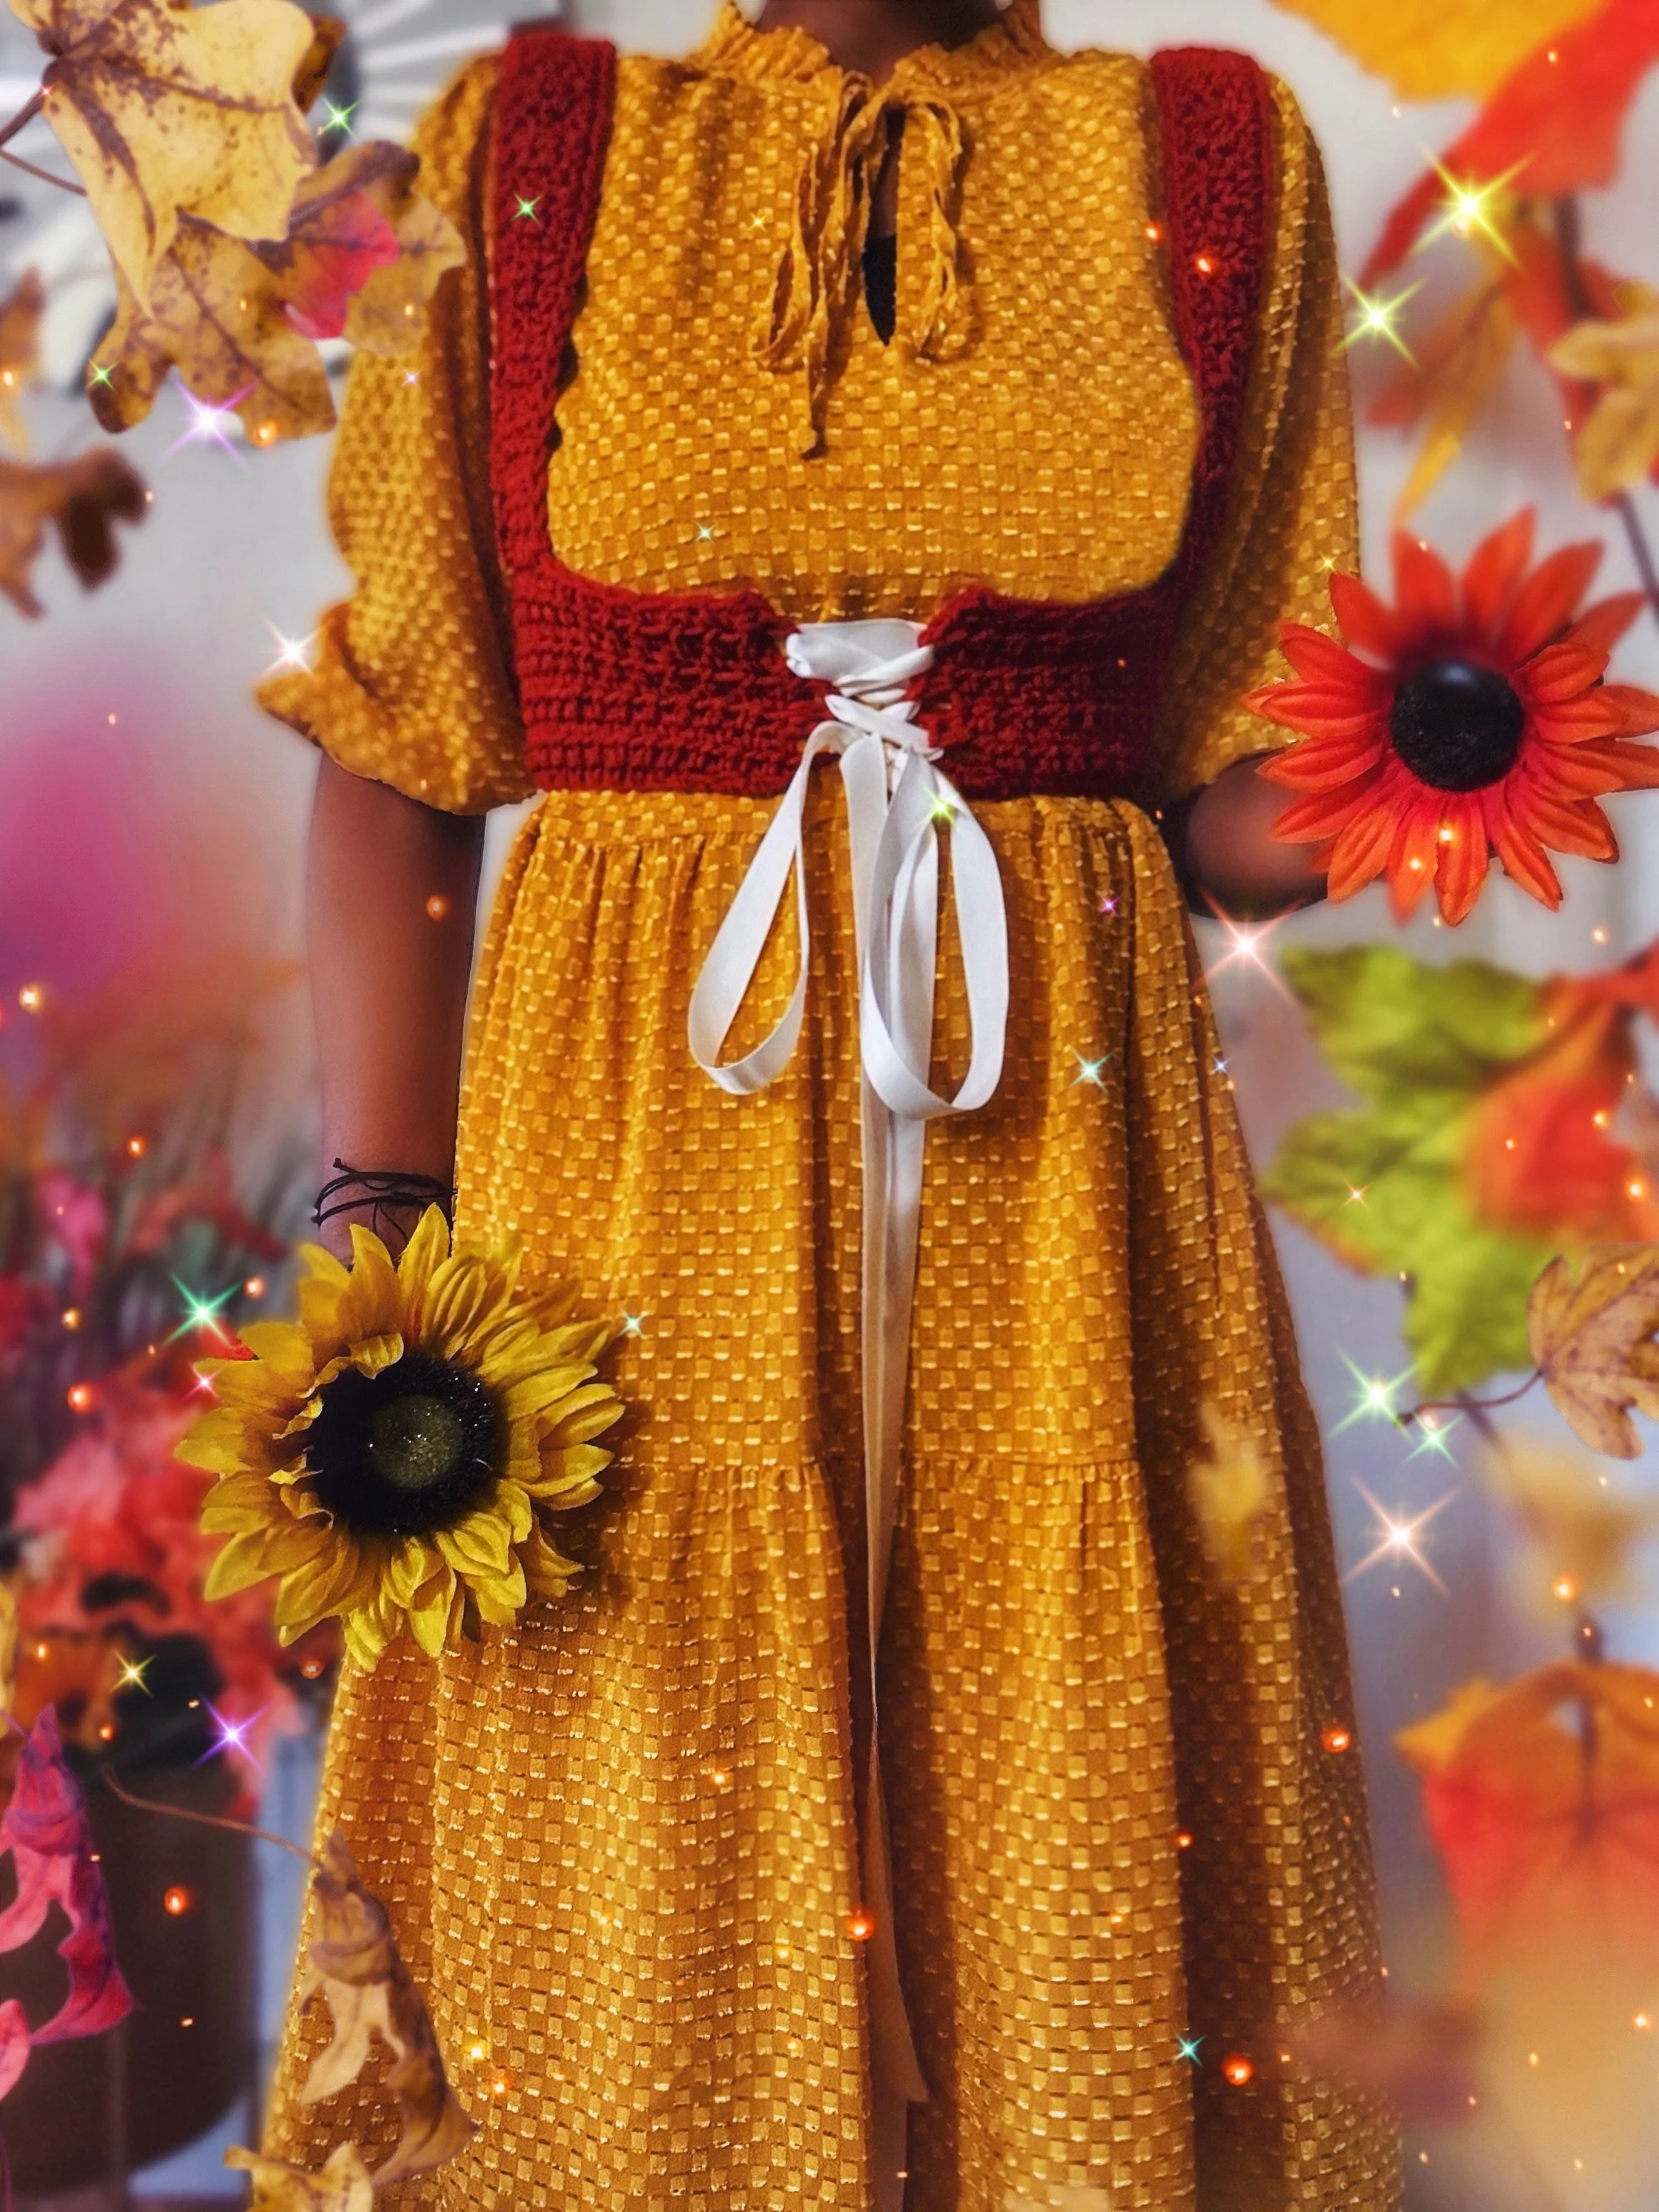
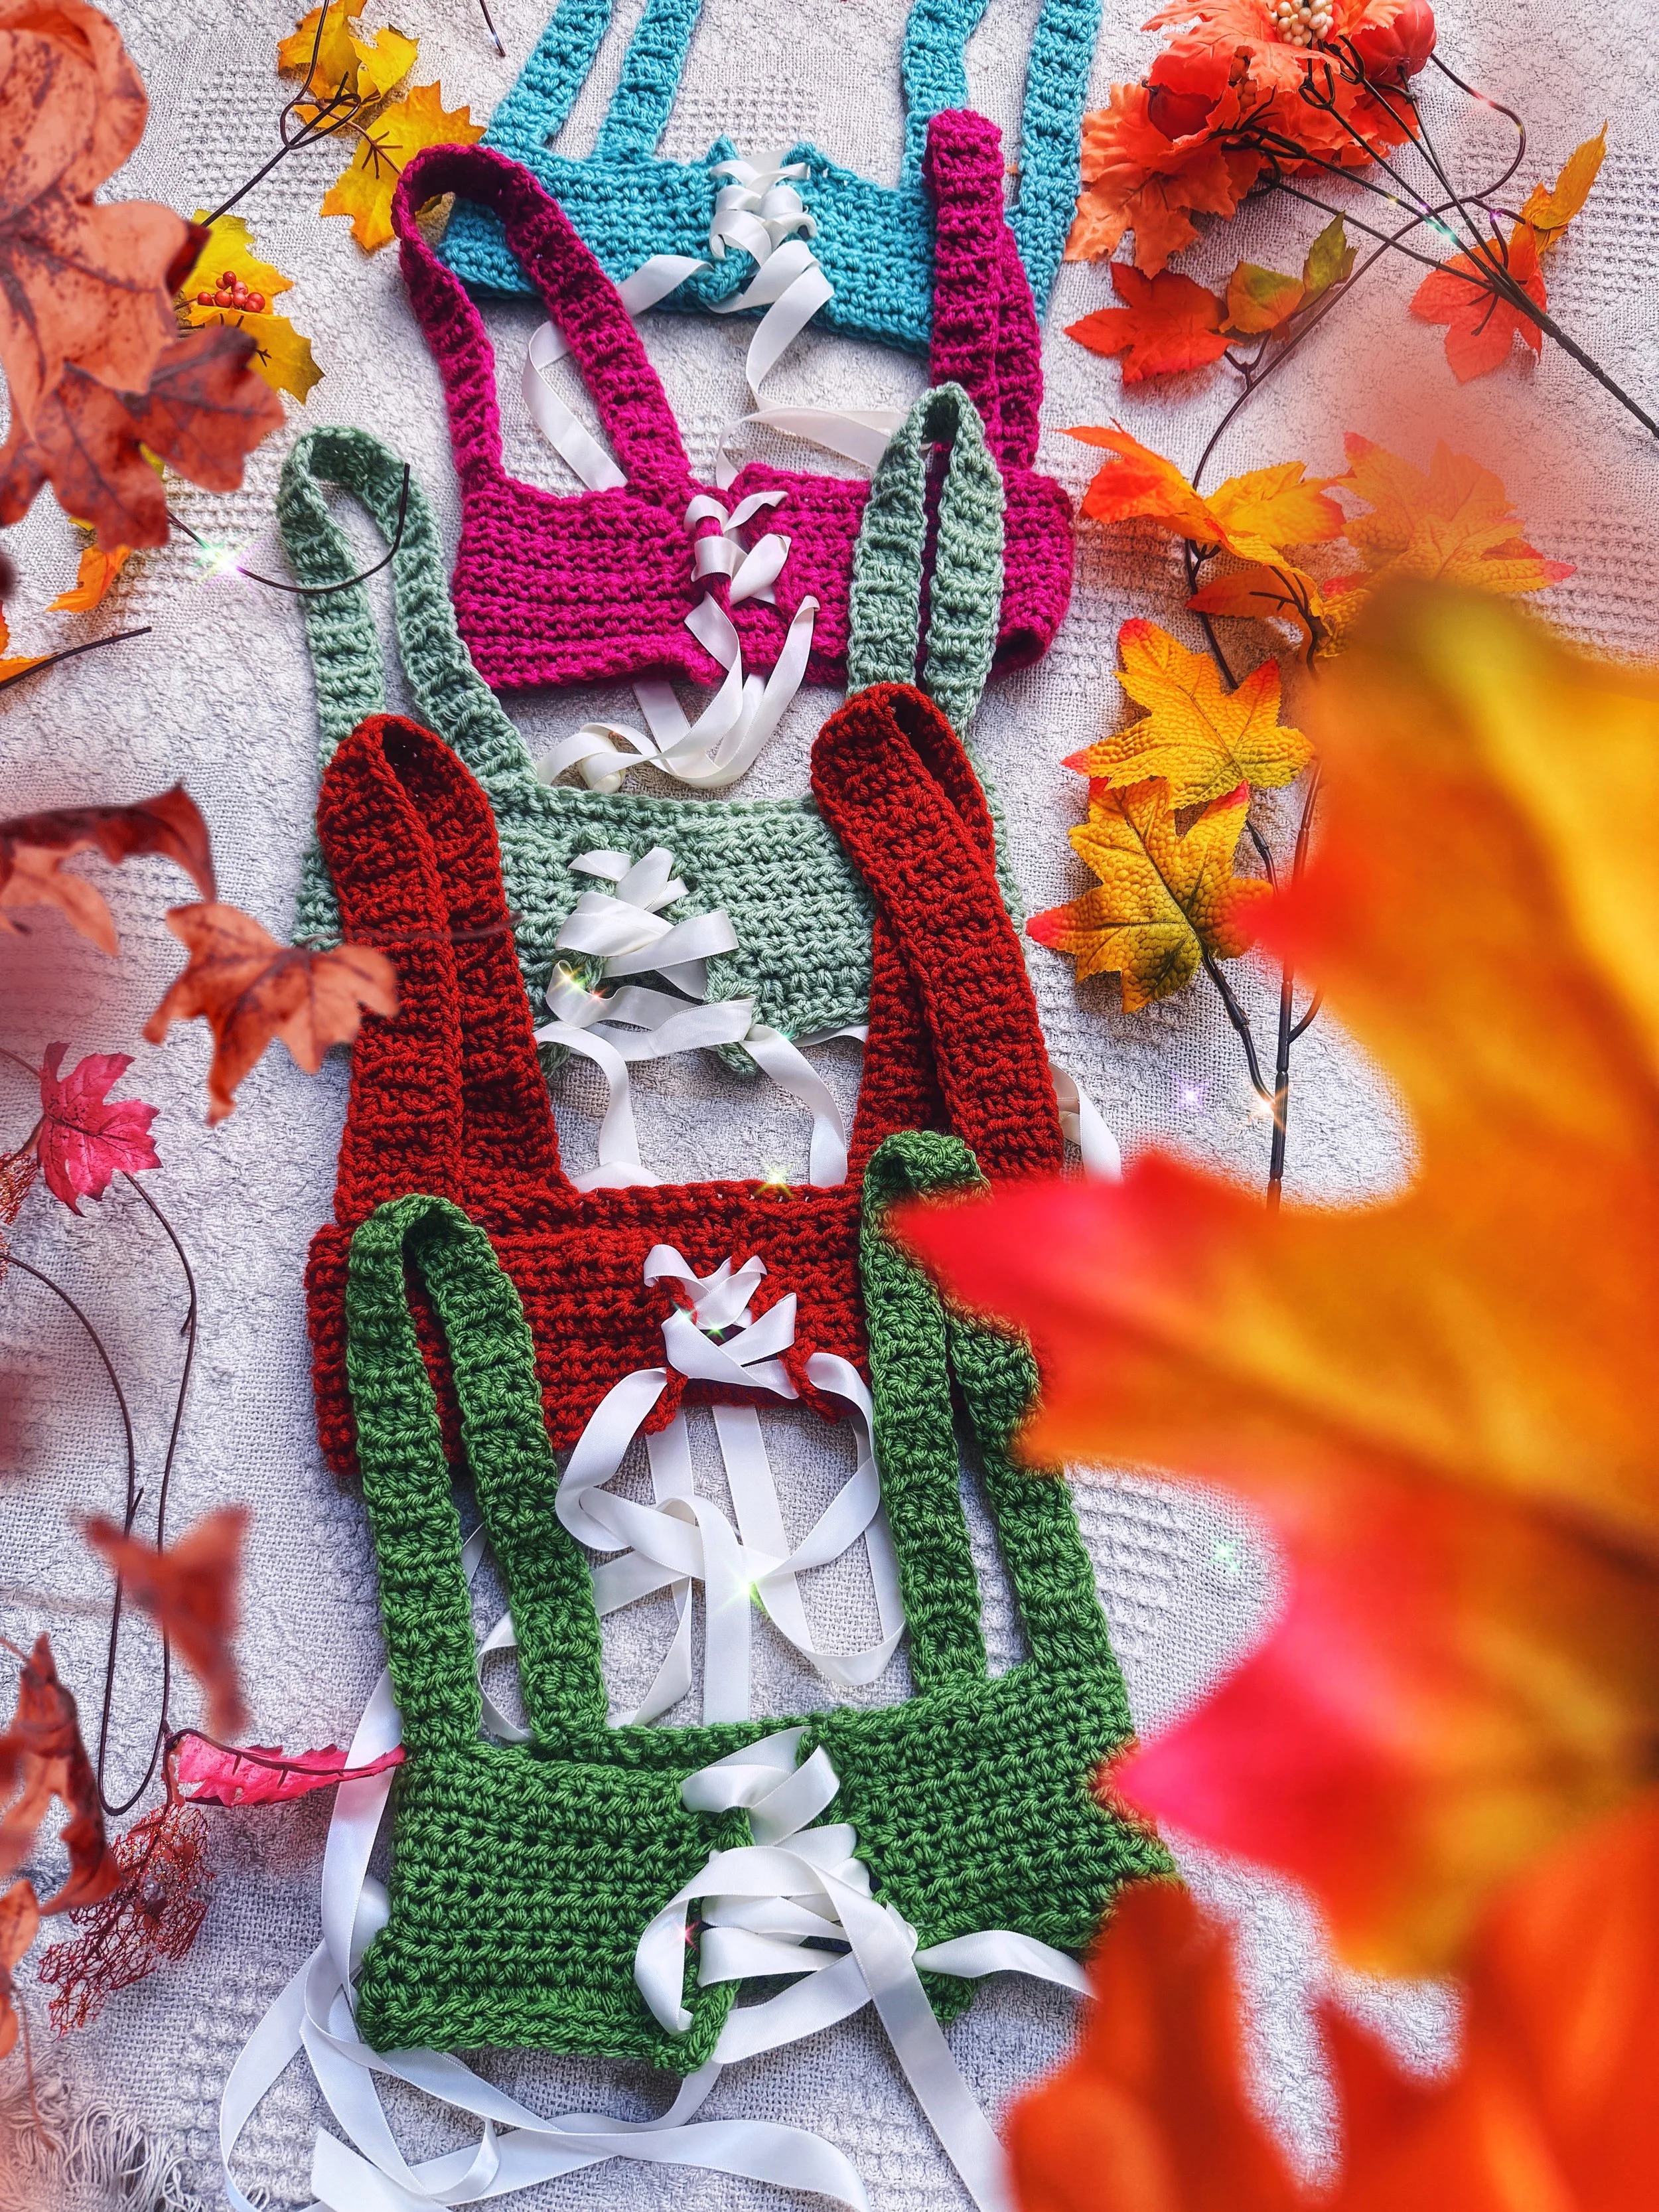
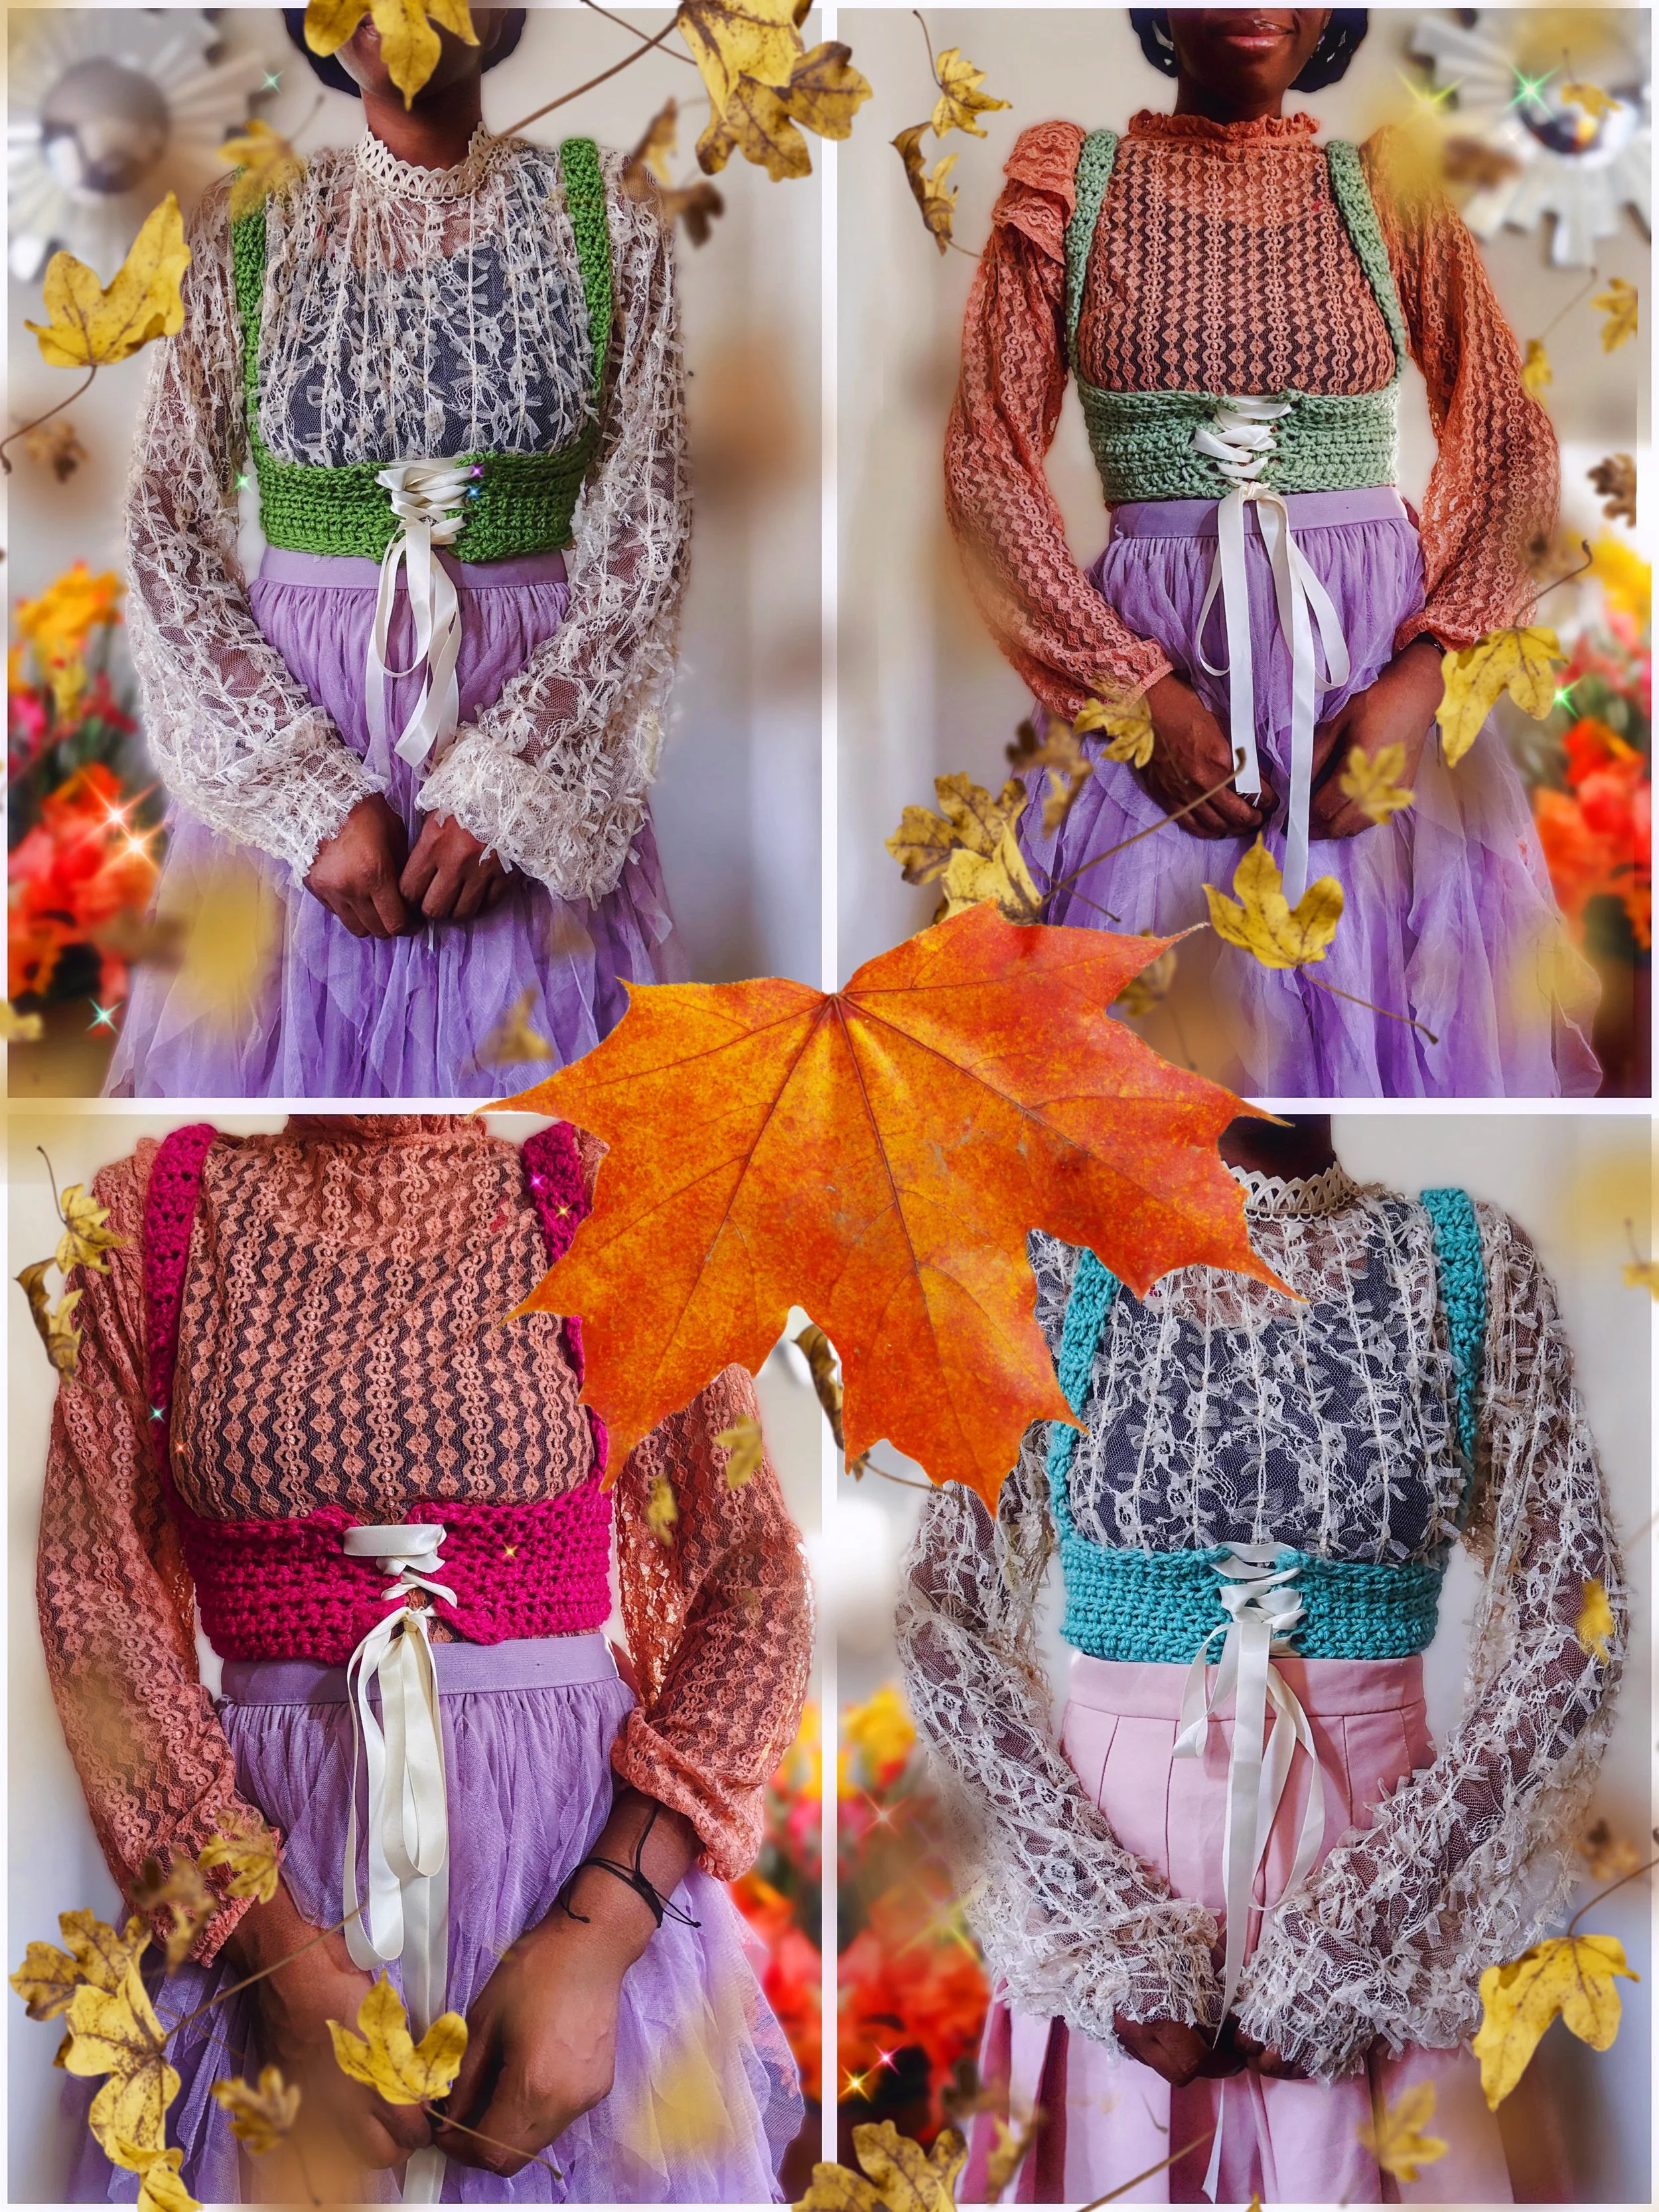
An under-bust crocheted corset with satin ribbon ties
Abbreviations:
CH [#] Turning Chain initiated
STS= Stitch [es]
SC= Single Crochet
DC= Double Crochet
SL ST= Slip Stitch
RPT =Repeat from asterisk, *follow repeating method from this starting point
STARTING THE PATTERN
Note: Pattern is constructed from the upper waist [right underneath your bust. Measure out the width, leaving an inch or so of space-so that the ribbon can cinch the remaining space. NOTE: May increase or decrease STS, at desired rows [length and/or width] for personal desired fit.
I CHAINED FOR 52 STS TOTAL. [24 inches width] [4 inches length]
MAKING THE MAIN BAND
First you will be creating the main under-bust waistband for the corset.
R1: CH1, and Work 1SC STS, into every ST [52 STS] going across the row, turn work to continue.
R2: CH2, and Work 1HDC STS, into every ST [52 STS] going across the row, turn work to continue.
R3: CH1, and Work 1SC STS, into every ST [52 STS] going across the row, turn work to continue.
R4: CH2, and Work 1HDC STS, into every ST [52 STS] going across the row, turn work to continue.
R5: CH1, and Work 1SC STS, into every ST [52 STS] going across the row, turn work to continue.
R6: CH2, and Work 1HDC STS, into every ST [52 STS] going across the row, turn work to continue.
R7: CH1, and Work 1SC STS, into every ST [52 STS] going across the row, turn work to continue.
R8: CH2, and Work 1HDC STS, into every ST [52 STS] going across the row, turn work to continue.
R9: CH1, and Work 1SC STS, into every ST [52 STS] going across the row, at final row, fasten off to complete work.
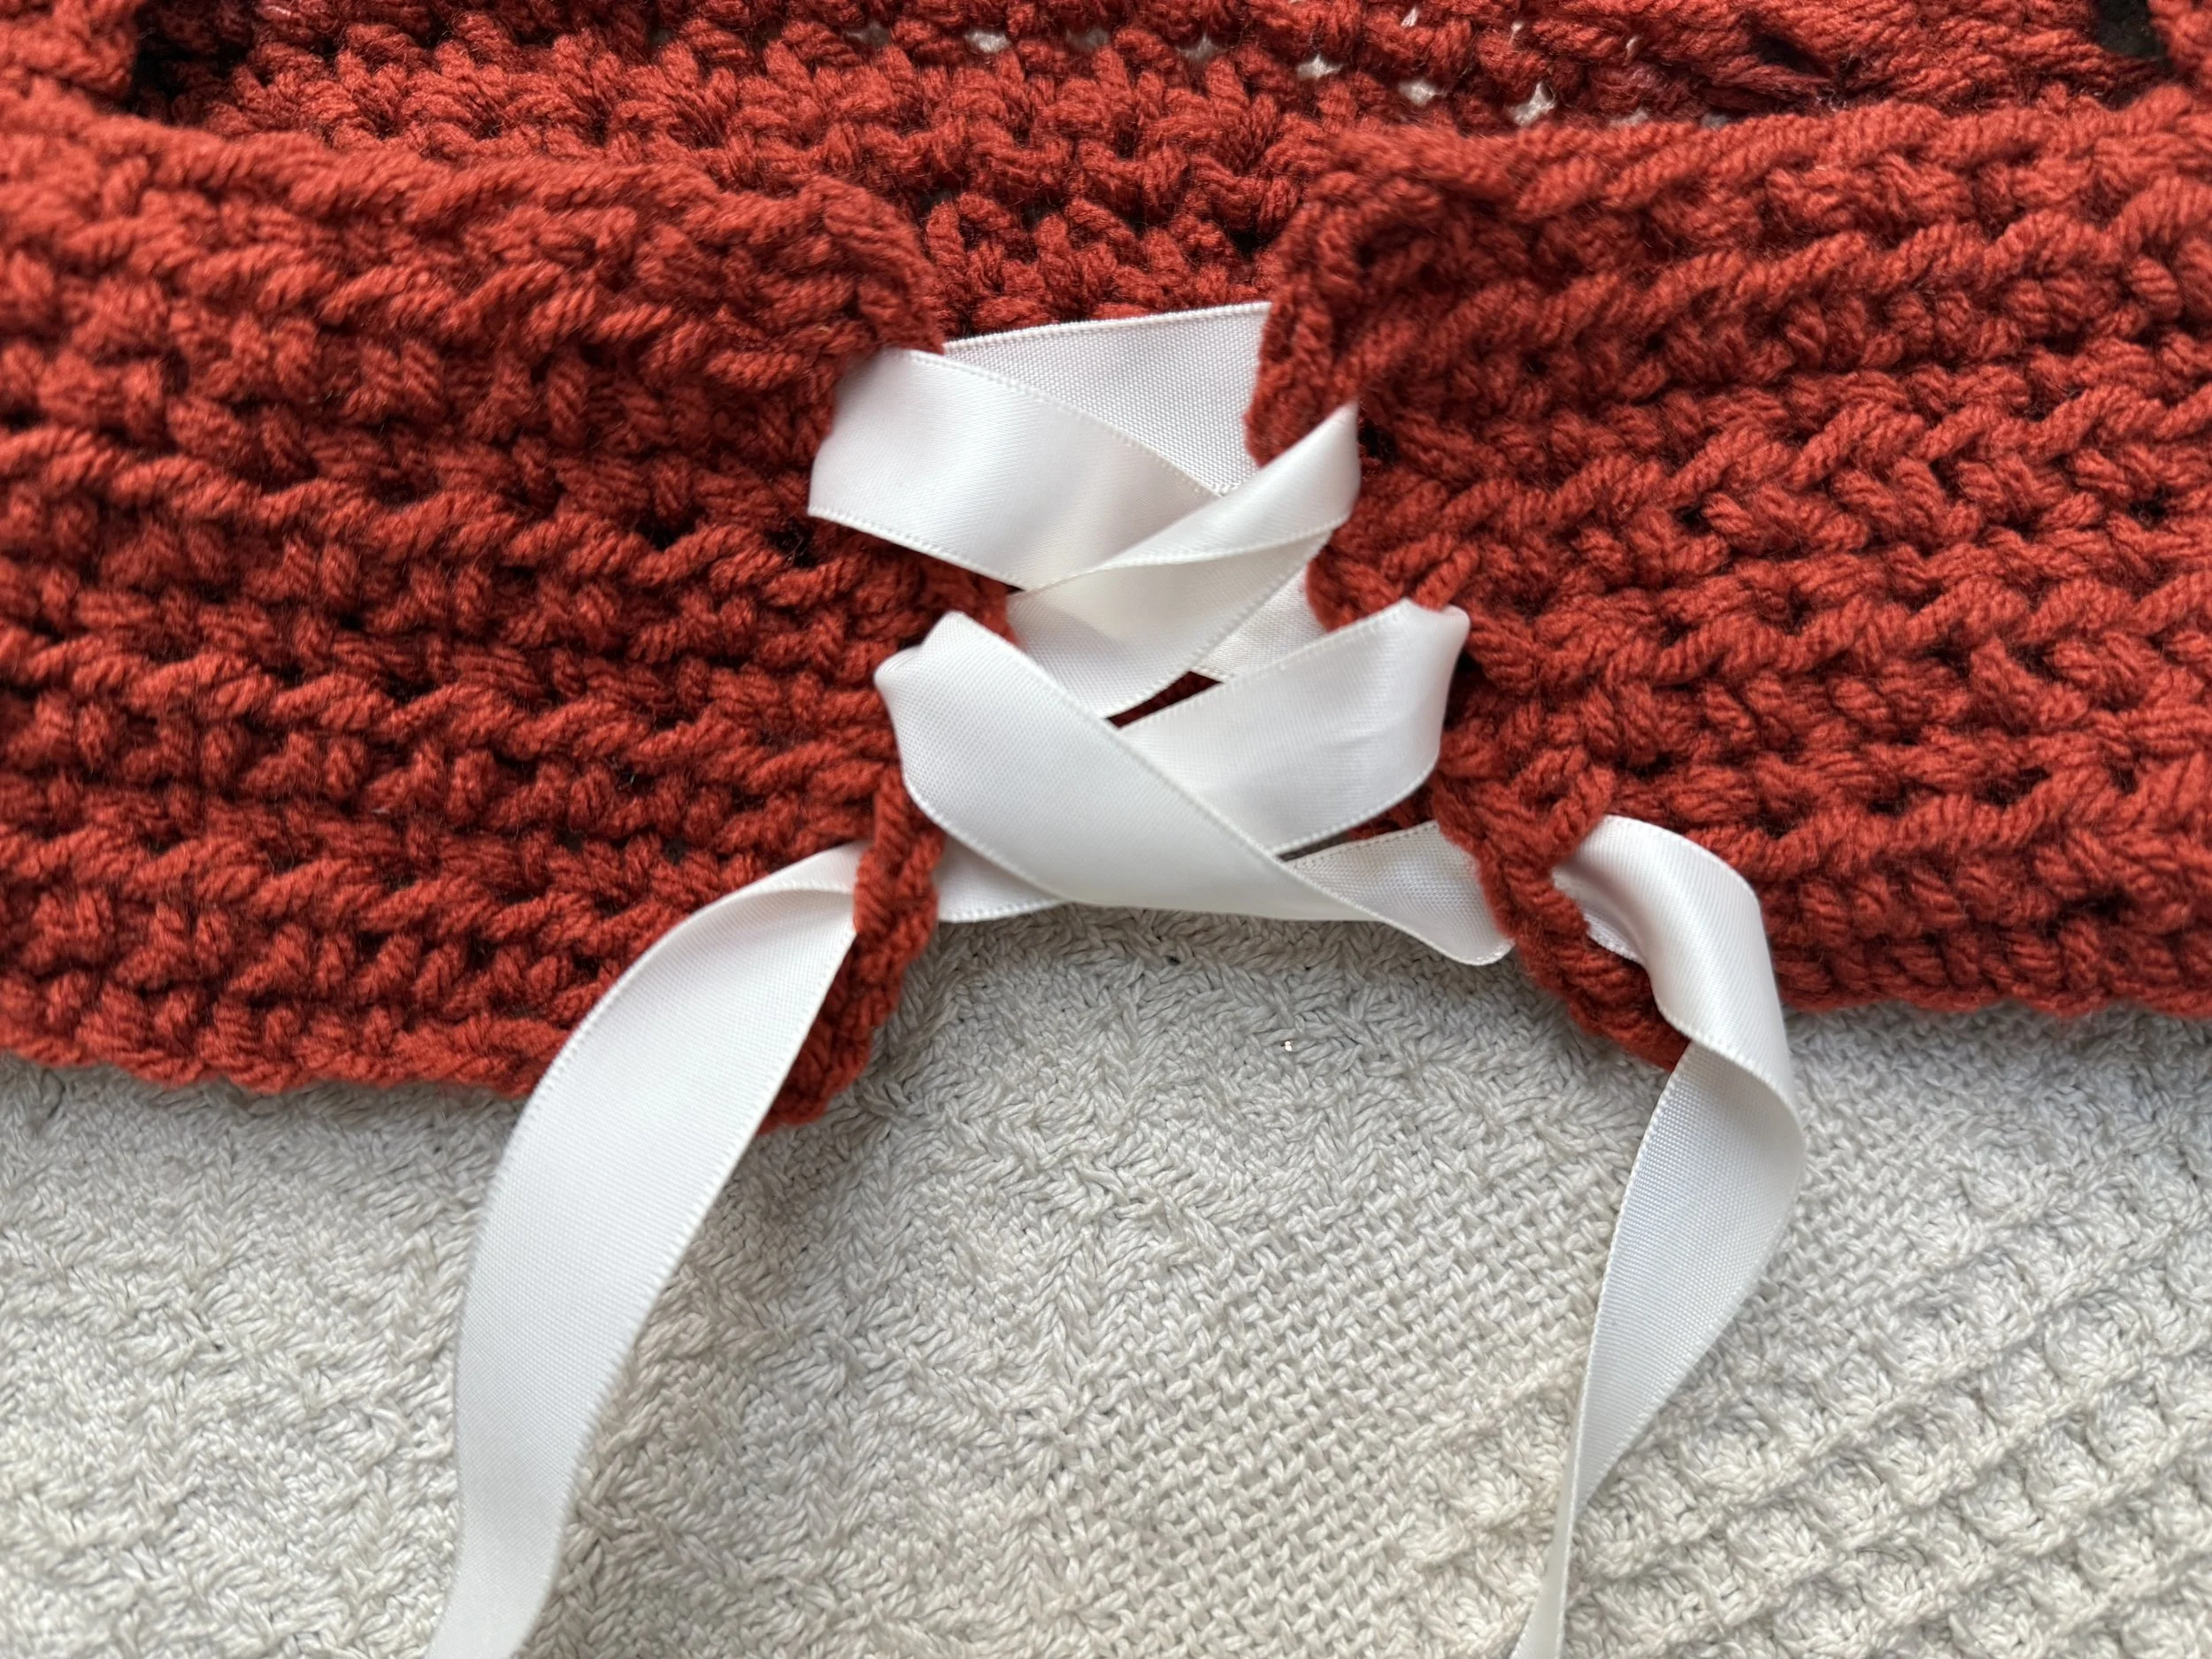
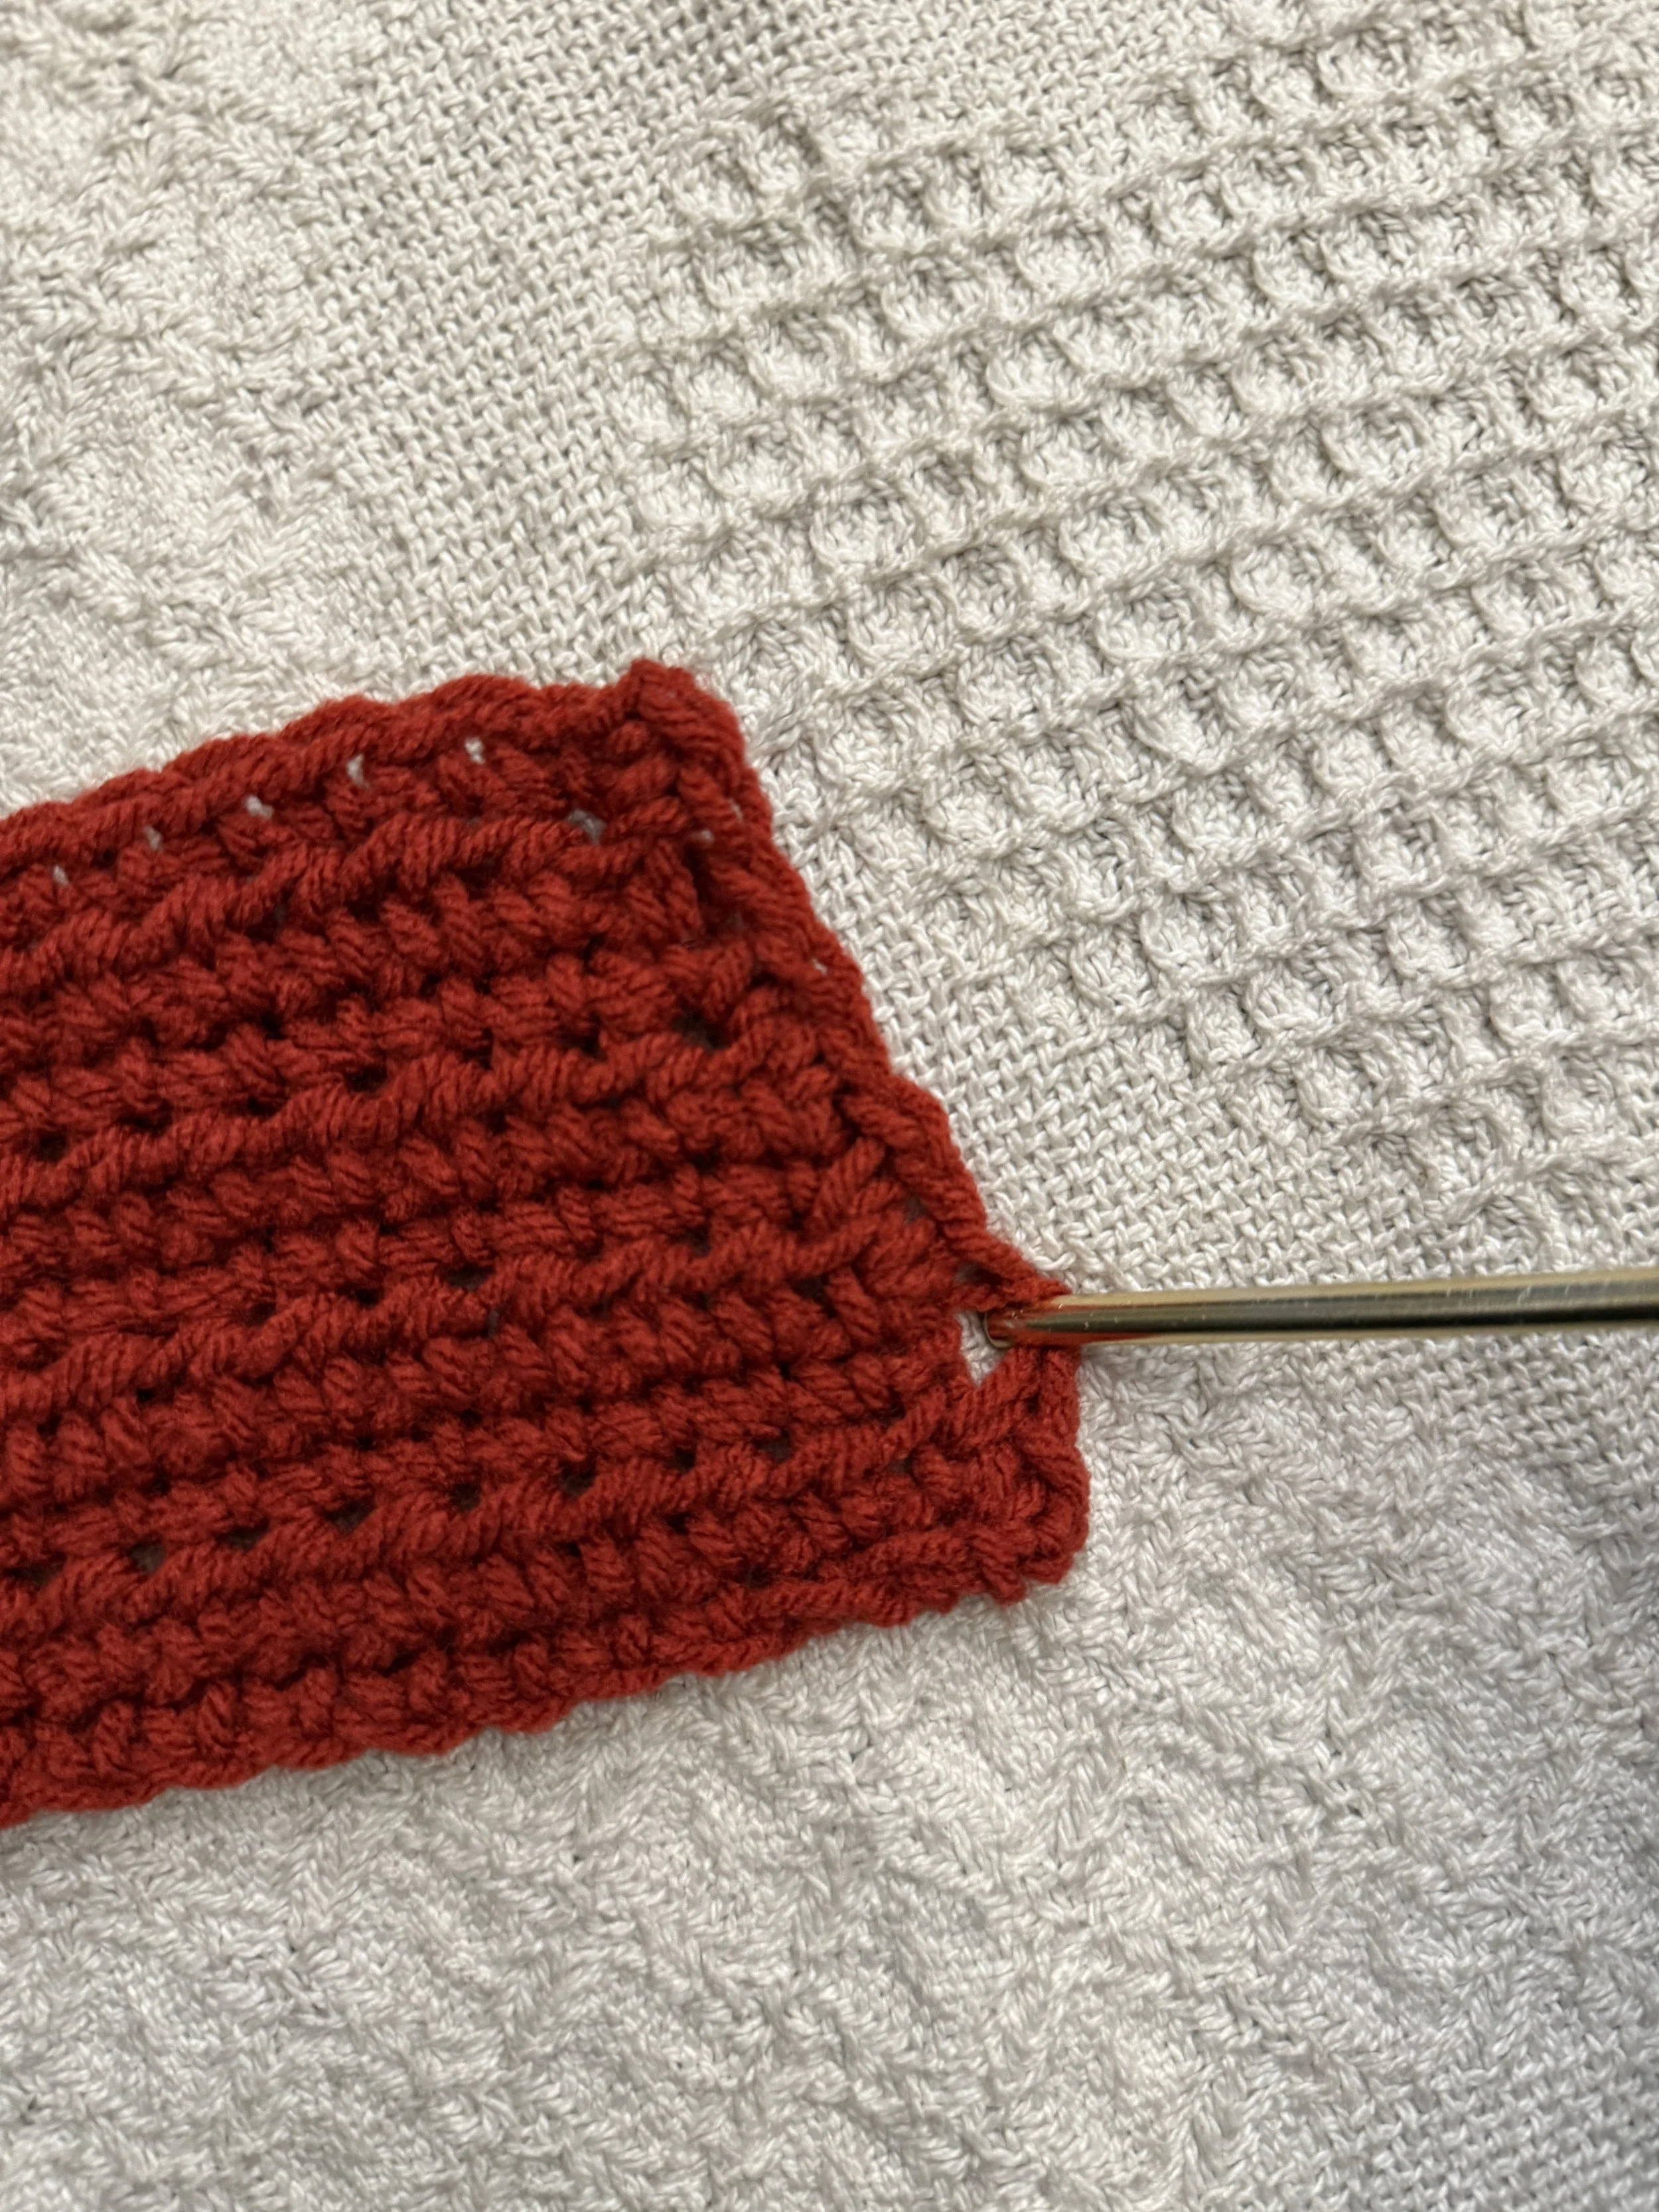
MAKING THE CORSET OPENINGS
Rejoin hook [into the side openings of the waistband] NOTE: Both Left and Right [vertically]
To create the openings for the ribbon.
R1: CH1 and work 1SC into the next 2 STS, then CH1, Skip 1 ST and work 1SC into the next 2 STS, then CH1, Skip 1 ST and work 1SC into the last 2 STS, fasten off your work. Rejoin hook into the opposite side of the waistband.
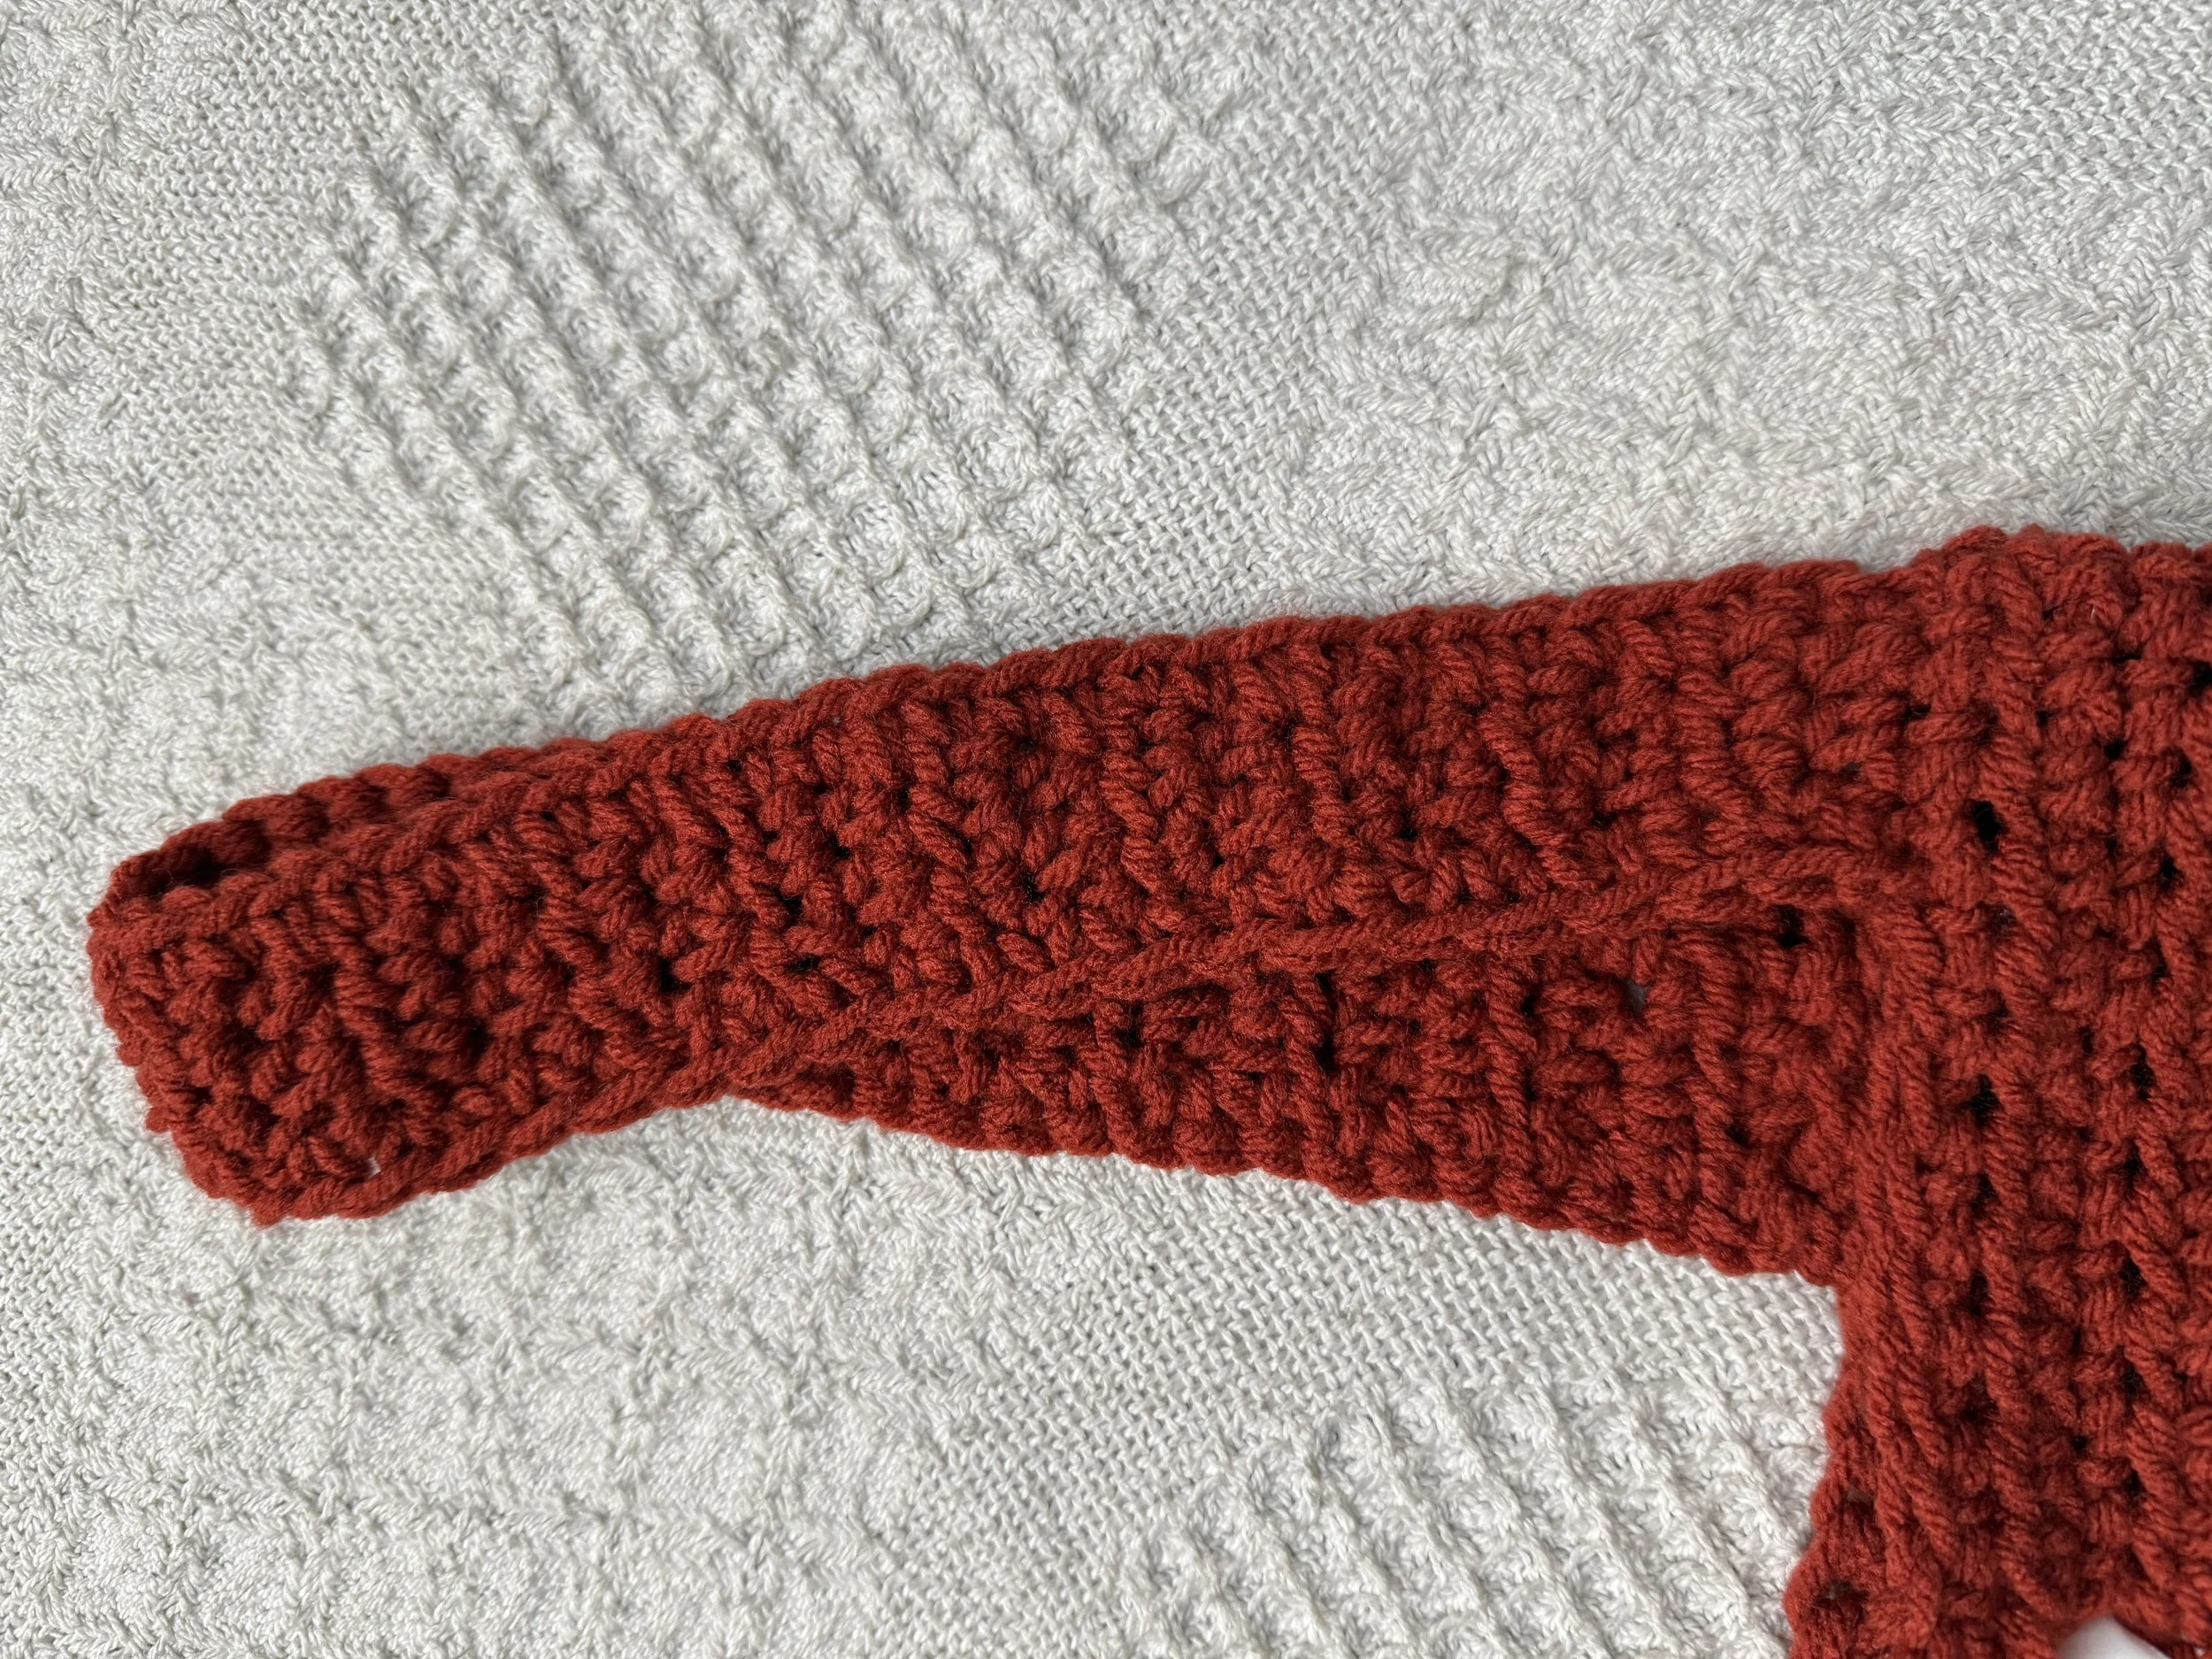
MAKING THE SHOULDER/STRAPS
Rejoin hook [into Row 9/ The TOP of the waistband]
Skip 8 STS to Rejoin your hook into the 9th ST to create the Shoulder/Straps.
R1-R38: CH2, and Work 1HDC STS into the next 3 STS, NOTE: 9th, 10th, & 11th STS-away from the opening of the waistband] work 1HDC into every ST [3 STS] going across the row, turn work to continue. At final desired row, fasten off to complete work. Also, Create accompanying Strap, for the opposite side of the corset too.
FINISHING TECHNIQUE
Rejoin hook, to Work 1SC across both sides of the Straps, At final desired row, fasten off to complete work.

ATTACHING THE STRAPS
Using your yarn needle, with a strand of yarn, skip 5 STS to attach the strap to the [which will be the BACK] of the Corset Waistband.
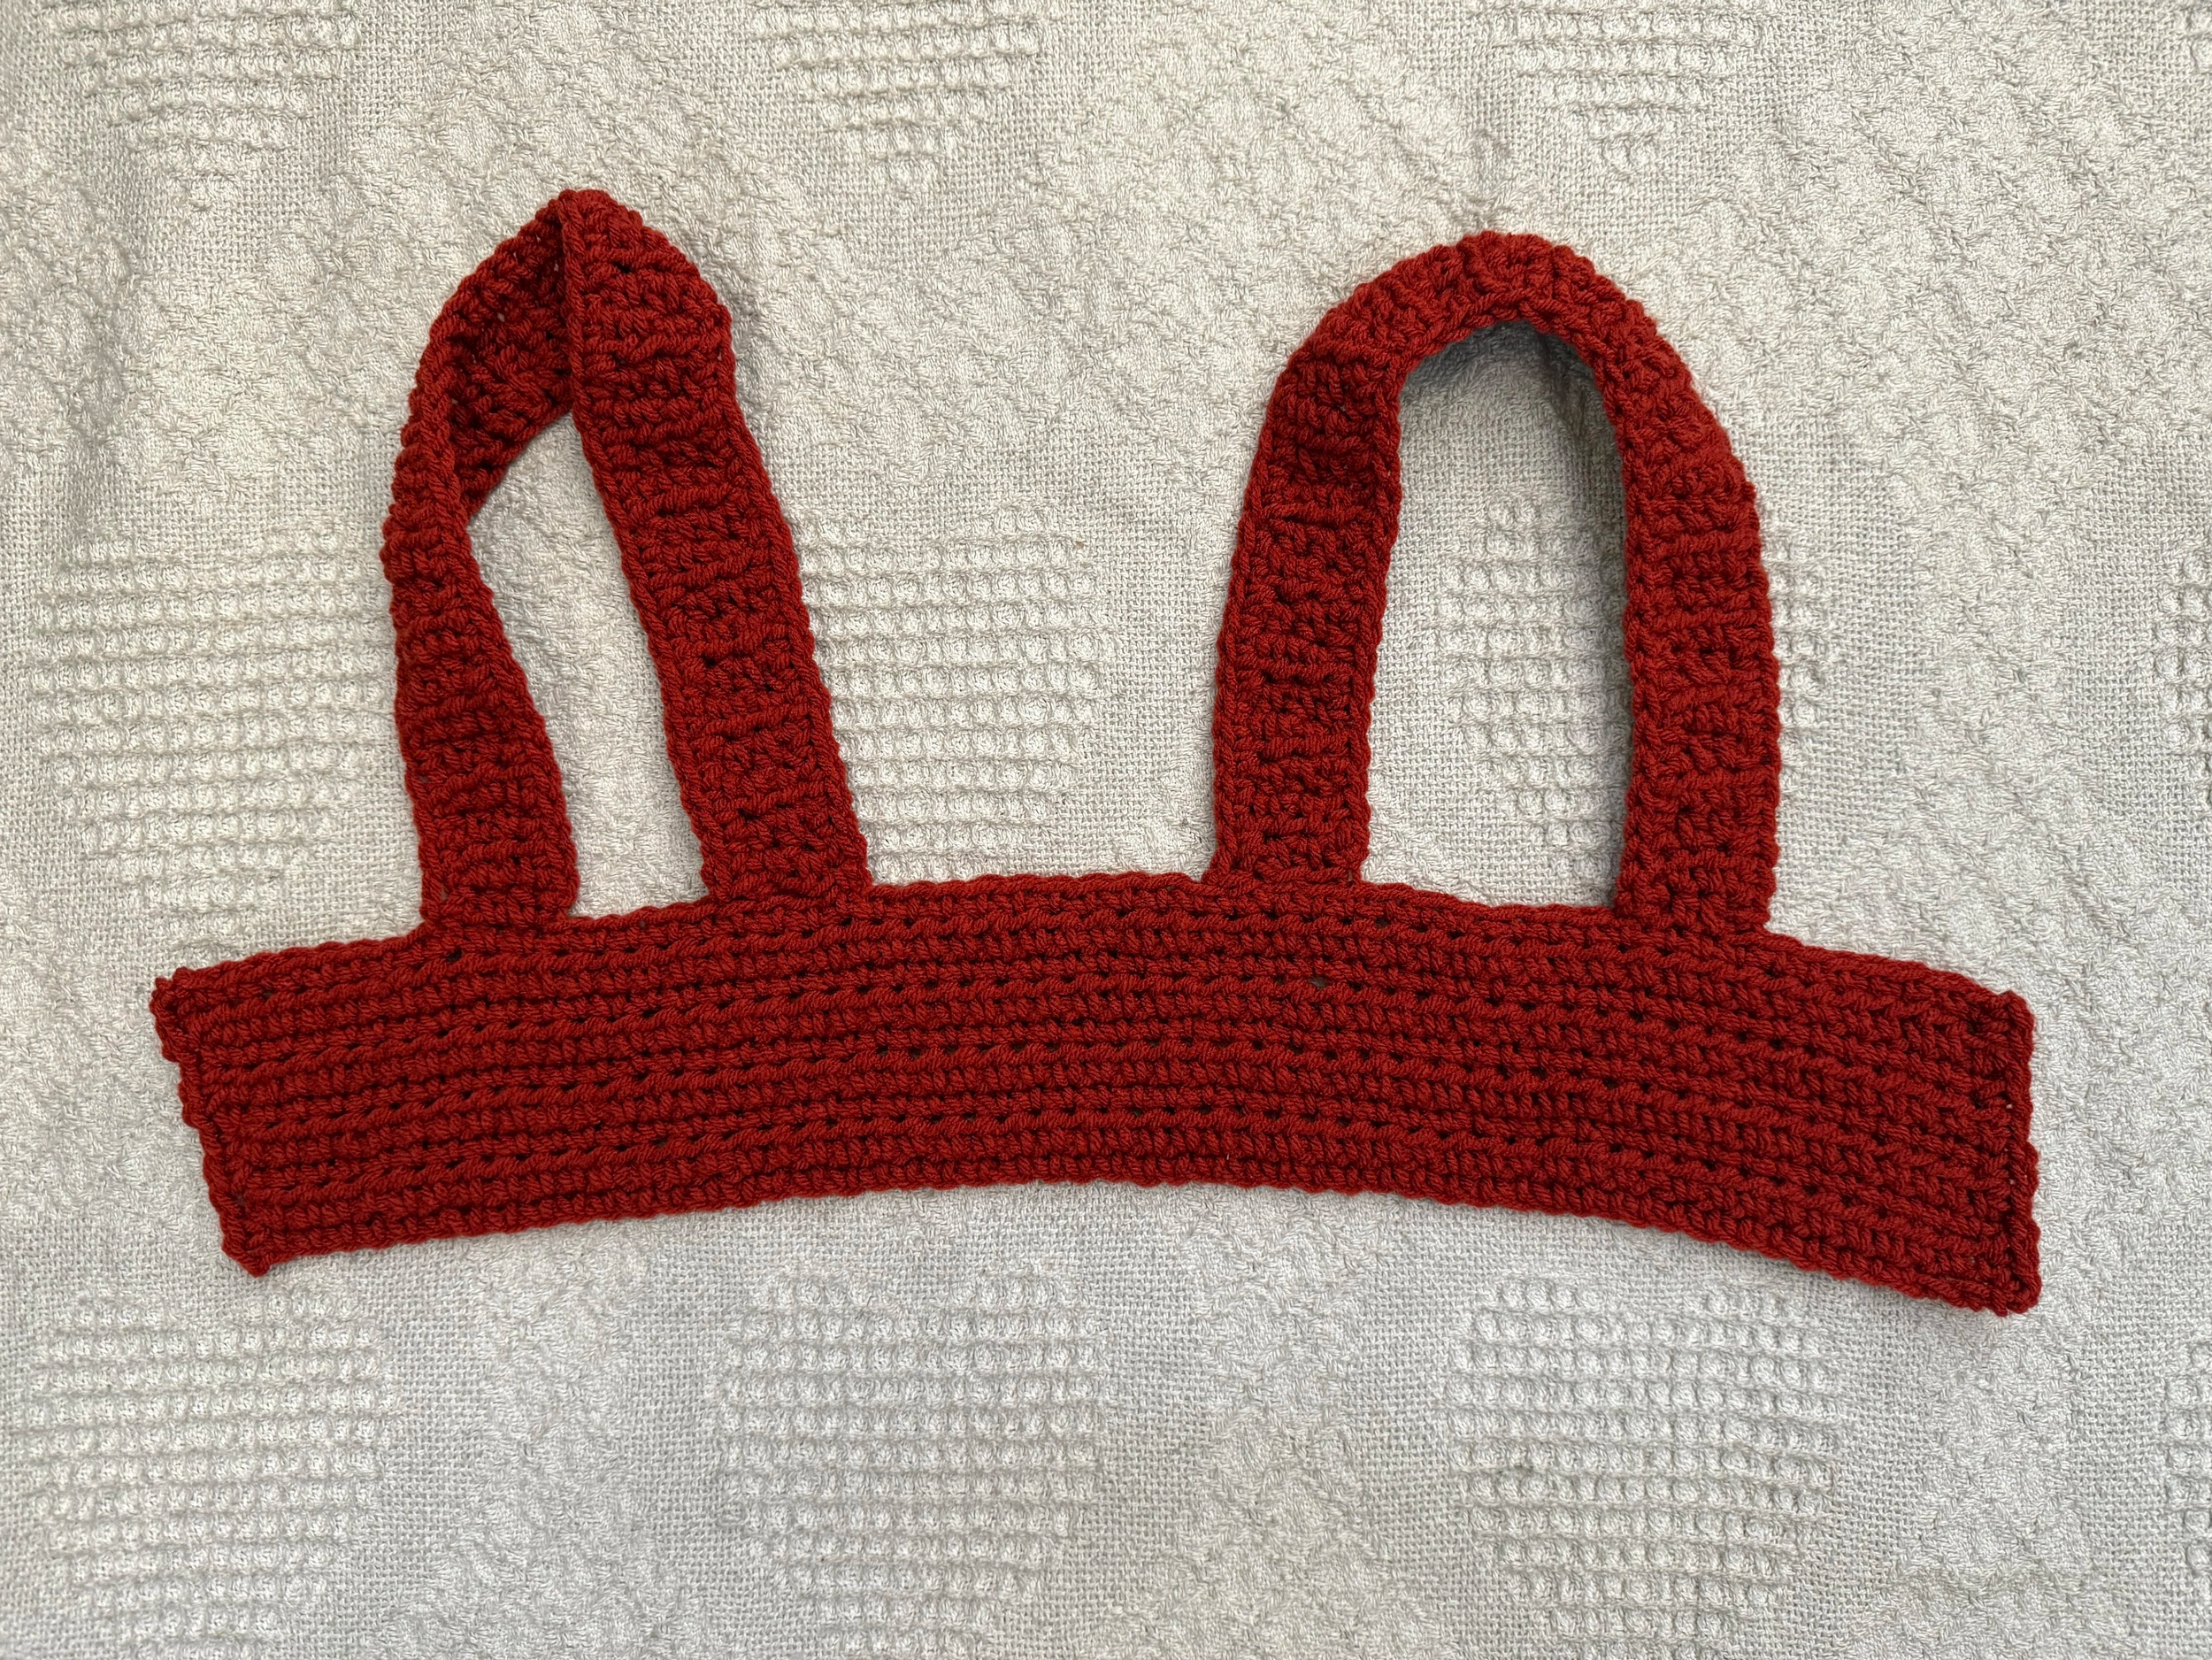
FINISHING LOOK
Now cut off the satin ribbon to attach in between the Chain 1 open spaces, to cinch the Corset.